
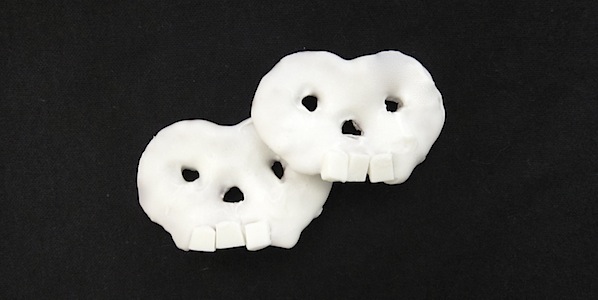

We’re playing with our food for this Iron Craft challenge. I knew right away what I wanted to make. I’ve been eating Pretzel Crisps lately for lunch and the shape really makes me think of a skull.

I thought it would be fun with Halloween coming up to dip them in white chocolate and add some teeth to play with that shape.
It took a little trial and error, but I think the end result is pretty successful. These are pretty simple to make too, though cutting the teeth is a little fussy.
Chocolate Covered Pretzel Skulls
Supplies:
- Small Sharp Knife
- White Chocolate Chips
- Shortening
- Microwave-Safe Bowl
- Pretzel Crisps
- Spoon
- Drying Rack
1. Cut the teeth – Use the small knife to cut the top off the white chocolate chips leaving a thin flat disc. Trim the disc to make it into a rectangle.
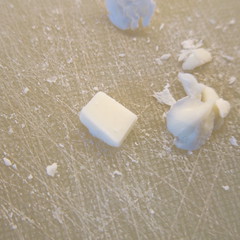
You’ll need 3 teeth per skull. Save the scraps of the chocolate to melt.
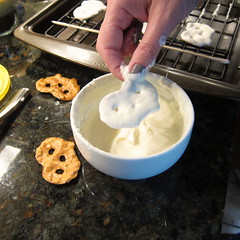
2. Melt the chocolate – Put the chocolate chips and shortening in the microwave safe bowl. I added about 3/4 tablespoon of shortening to 1 1/2 cup of chips. Melt on high in the microwave for 1 minute. Remove and stir. Continue microwaving 10 seconds at a time until completely melted. (White chocolate can sieze fast, so don’t over microwave.)
Why shortening? Shortening makes the chocolate thinner and allows it to coat the pretzel much better. Look at the difference in these two photos.
The first one is straight melted chocolate, while the second is chocolate with shortening. Huge difference.
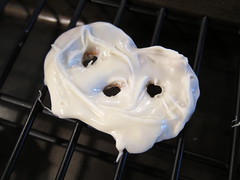
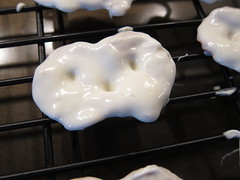
3. Dip the pretzels – I tried different methods of dipping, but really the easiest and best was just using my fingers.
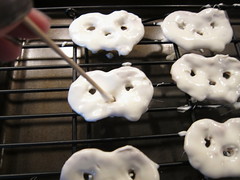
Let the chocolate drip off the back a little and them place on the trying rack. (I put a baking sheet under the drying rack to catch drips.) Don’t worry about the eyes nose yet.
4. Add the teeth – I experimented with different numbers of teeth and decided I liked 3 best.
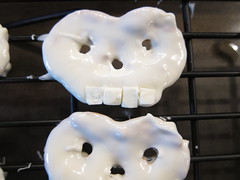
5. Clear out eyes and nose – Use a skewer or toothpick to poke the chocolate out at the eyes and nose. I found this easiest to do when they have sat a little while, so the chocolate is not completely solid yet, but not too wet either.
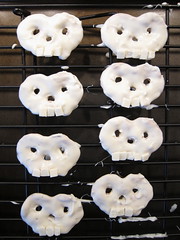
6. Let harden – You can do this at room temp or in the fridge. It went pretty fast at room temp. You can smooth out any rough parts you aren’t happy with when they are almost hardened with a little water on your finger. Store in an air tight container.
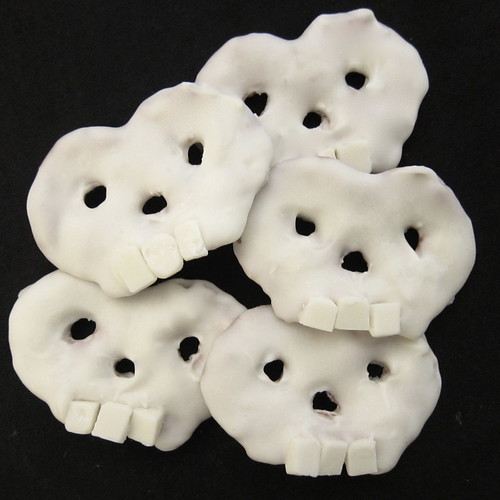
I hope a tray of these, not too creepy, skulls are a hit at your Halloween party.
© 2005 – 2012 Kathy Lewinski & Susan Cornish


2 Comments to Iron Craft Challenge #20 – Chocolate Covered Pretzel Skulls