

(Every week until December 1st we will be making a small Christmas ornament that can be used in our Pocket Advent Calendar. Join us in making all 24 or just pick and choose your favorites.)
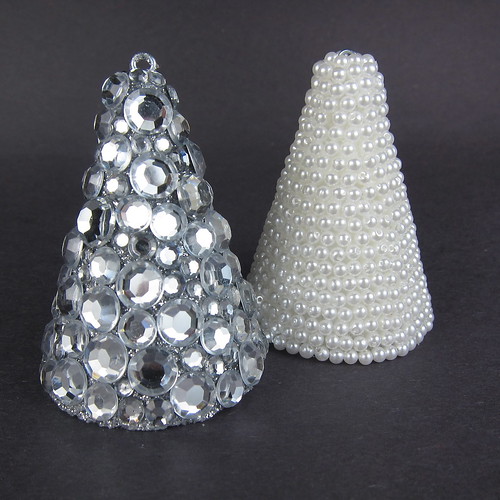
This week are making some blingy, little jeweled trees.
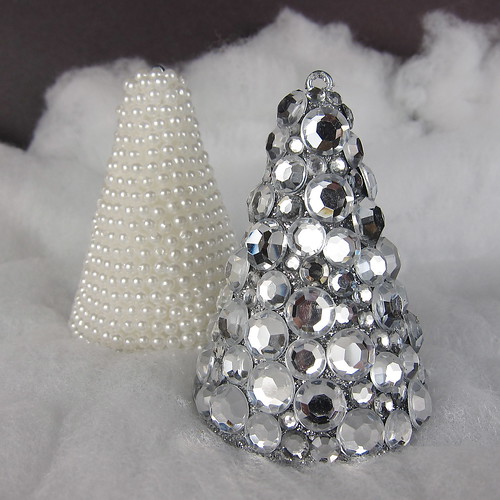
It’s a little fiddly getting all the jewels on the trees, but I think the results are worth it. Make them with the screw eye on top to hang in your tree or create a whole forest of them for your mantle or a centerpiece.
My biggest tip for making these is to use glue made for styrofoam. Most other glues will not stick to the styrofoam or worse eat through it. I use a glue called Hold the Foam, it is quite thick, dries clear and works perfectly.
Jeweled Trees
Supplies:
- small styrofoam tree forms (mine were 2 3/4 inch)
- styrofoam glue
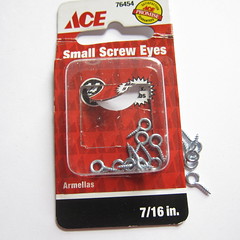
- small screw eyes
- small paintbrush
- glitter (optional)
- rhinestones in various sizes (I used all silver, but other colors would look pretty too.)
- “pearl” beads
- white or grey felt
For both trees:
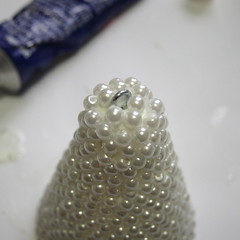
Put a bead of glue on the screw end of the eye and insert into the top of the tree form. Let dry.

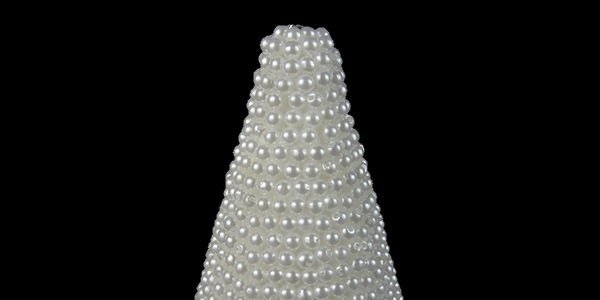
For the pearl tree:
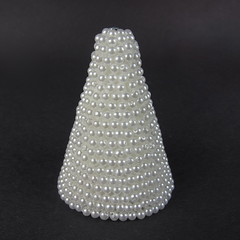
Use a paintbrush to paint the glue on a little at a time and add the pearl beads in rows. If the beads have a hole, try to postion them so the hole doesn’t show.

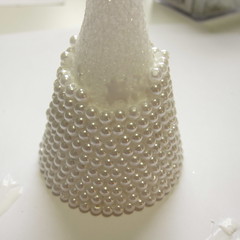
Work your way up to the top of the tree. Don’t worry if your rows aren’t perfectly straight. Cover the top with pearls, being careful not to complete block the eye for hanging.
Let dry overnight.
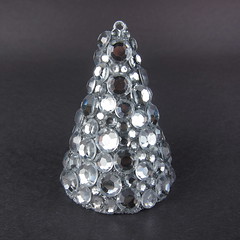
For the rhinestone tree:
Use a paintbrush to coat the tree form with paint and then sprinkle on glitter to match your rhinestones. I found it easiest to do a section of the tree at a time. Let dry.
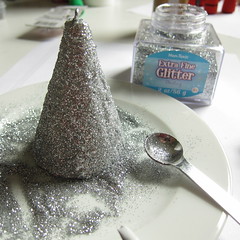
You could skip the glitter step, but the rhinestones do not cover the form completely like the pearls. I think the tree looks richer with glitter between the rhinestones instead of white styrofoam.
When the glitter is dry start glueing on rhinestones. I tried to vary the size of the rhinestones throughout the whole tree, though you will need mainly small ones at the top. The more sizes of stones you have the more of the tree you can easily cover. Let dry.
For both trees:
Cut a circle of felt the size of the bottom of the tree and glue it on. I used white for the pearl tree and grey for the rhinestone.
Now set them out where they’ll catch the light for a dazzling Christmas decoration.
© 2005 – 2012 Kathy Lewinski & Susan Cornish


Pingback: Jeweled Christmas Trees | Crafts: Unknown Knowledge | Scoop.it
Pingback: Jeweled and Pearled Christmas Trees – Home and Garden