

For this Iron Craft Challenge we were asked to make something incorporating letters or words. My project was inspired by glitter letters I saw for sale in the Pottery Barn catalog a year or so ago. They sold separate letters that you could string to spell different things. I don’t remember exactly, but I think they were like $5 each! Definitely something to make instead of buy.
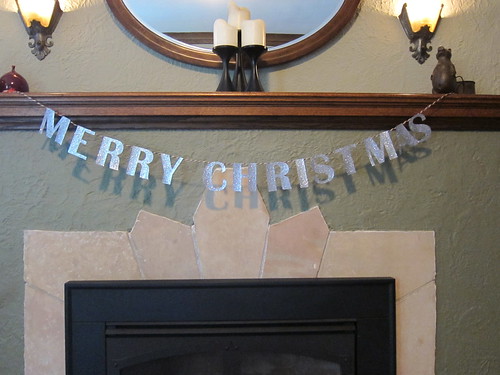
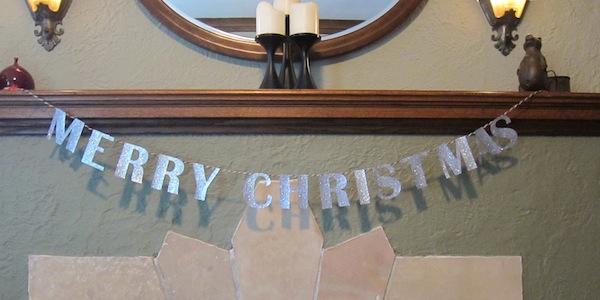
Yes, that says Merry Christmas. And yes, it is June. I’m just getting a head start on the decorating theme I’m planning for the holidays. (A good crafter starts preparing for the holidays early, right?) Of course, these would be fun for any other occasion, birthdays, weddings, etc…
This is a really simple project, cut out letters, glitter letters and hang letters, but I really focused on finding the easiest (and neatest way) of making the glitteriest letter.
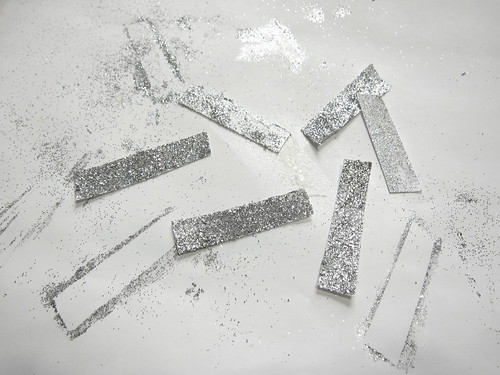
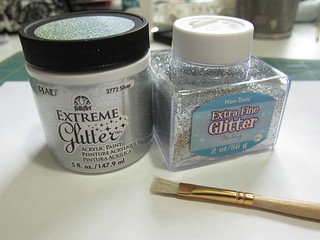
I tested a couple different methods. First I tried glitter paint. Even “extreme” glitter paint required tons of coats to get close to the heavy glitter coating I wanted. Then I tried the put glue on the letter and sprinkle with glitter method using spray glue and tacky glue. Talk about a mess and the letters still weren’t completely covered. I also tried dipping the glue covered letters into a dish of glitter, but still got the same results. Finally, I tried using the glitter paint and “painting” more loose glitter on it. That was the solution, it only took one application to get a thick coat of glitter, the glitter stuck on really well and it was the least messy of all the applications.

Glitter Letter Bunting
Supplies:
- Card Stock
- Scissors
- Glitter Paint (in a color to match your glitter)
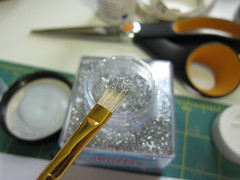
- Fine Glitter
- Paint Brush
- Hot Glue Gun and Glue Sticks
- Twine or Ribbon
1. Print your letters on cardstock and cut them out.
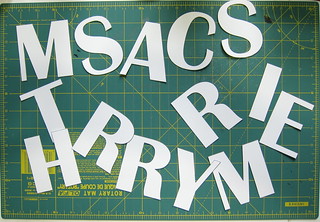
When you print the letters you only want to print the outline. You can do this in Word in the Font Format Menu. Chose Text Effects and change the Text Fill to No Fill and Text Line to black. The font I used is Britannia Bold at a size of 350. (If you don’t want to cut out your own letters you may be able to find some precut at the craft store.)
2. Place the letters on a protected surface like a scrap piece of paper. Now apply the paint and glitter.
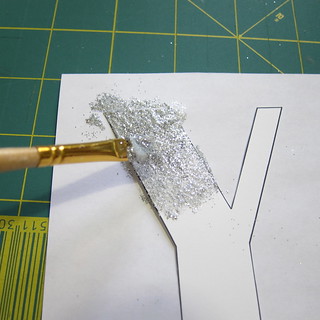
I started by putting a coat of paint on the a small portion of the letter. I dipped the paint brush in the paint again and then glitter and dabbed the glitter on until it was completely, and thickly, covered. Sometimes I also mixed a little glitter and paint together and painted that on. This last way got a little clumpier than the dabbing.

3. Work until the letters are completely covered in glitter and let dry flat.
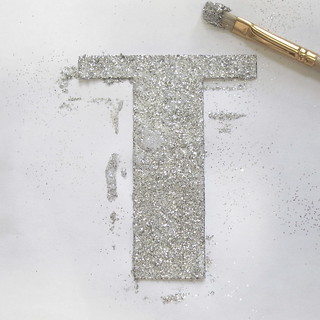
You can touch up any spots you missed with a paint brush with a little paint and glitter on it. If there are any clumps of glitter hanging off the edges of the letter they rub right off with your finger.
4. When all your letters are dry glue them to the a length of twine or ribbon, make sure to leave extra twine on both ends for hanging.
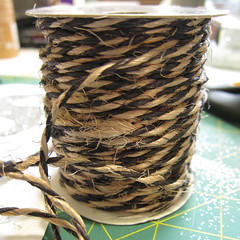
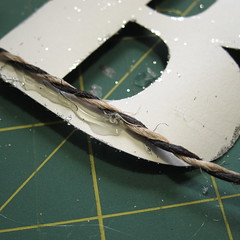
Just put a line of glue across the top back of each letter and adhere the twine. I found hot glue worked beast because it stuck so quickly and securely. I got my two color twisted twine at Ikea in their gift wrapping section.
Hang and enjoy you custom bling!
© 2005 – 2012 Kathy Lewinski & Susan Cornish


2 Comments to Iron Craft Challenge #11 – Glitter Letter Bunting