
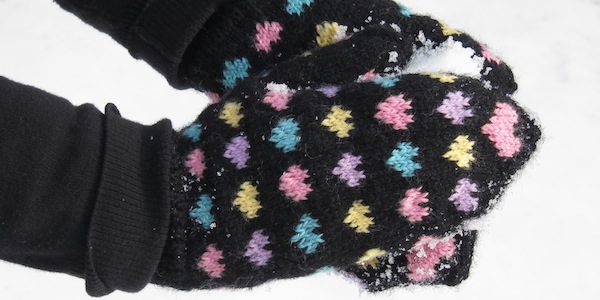

These mittens were inspired by that classic Valentine’s Day treat, the conversation heart. It took me about a week to design and knit up these mittens, so you still have plenty of time to make them for a VD gift or fashion statement.
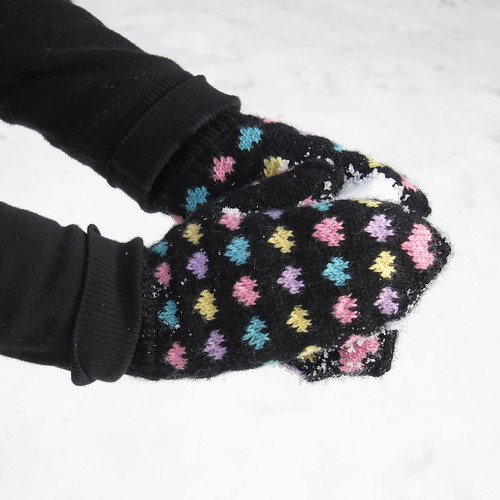
The mittens themselves are a pretty basic pattern and chart isn’t even really tricky. The challenging part of these, for me anyway, was that I wanted two colors of hearts on each row which means you are carrying three colors at a time. Yes, it takes a little practice, but you end up with a colorful, thick, warm mitten.
Here are a few of my tips on making these mittens if working with multiple colors is new to you.
- Your yarn will get twisted. I found that letting it untwist after every row saved my sanity. Yes, it adds a little time to your knitting, but it’s so worth it.
- Twist your yarns together every 3 or four stitches. This will keep you from having long floats, keep a more even gauge and a have a neater inside.
- Do not twist your yarns at the stitch markers on the row before you will do an increase for the thumb. The increases are made by picking up the yarn between the stitches. If you twist here is it is really hard to get the yarn to pick up.
Finding a yarn that had all the right colors was also tricky. I ended up going with Stitch Nation Washable Ewe since it had the perfect pastel pink, yellow and purple as well as black. The blue is off a little, but it was the best I could find. The candies also come in pastel green, orange and white if you want to add more color to your mittens.
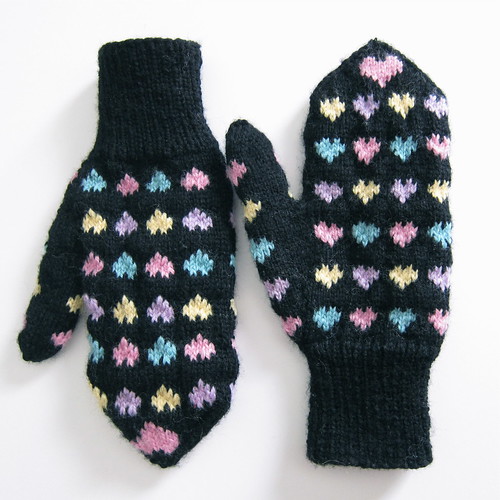
Let’s talk about size, I made these mittens to fit me, so they are a women’s large size 8. I do have a long hand, if your hand is on the short side you may want to try it on after the fifth row of hearts, if it hits the top of your baby finger skip the last row of hearts and move on to the decreases with the large heart. You can do the same thing with the thumb after the fourth heart. Need a bigger mitten? Jump up a needle size for a larger gauge for a slightly larger mitten.
Sweetheart Mittens
(Click here to download the PDF Sweetheart Mittens Pattern )
Supplies:
- Worsted Weight (4) yarn – approx. 180 yards black, 50 yards each pink, blue, purple and yellow (I used Stitch Nation Washable Ewe).
- Four size 2 double-pointed needles
- Three stitch markers
- Stitch holder
- Tapestry needle
Gauge – 7 stitches and 9 rows per inch in stockinette
Abbreviations:
- K = knit
- P = purl
- Kfb = knit twice into the same stitch, once into the front and once into the back increasing one stitch
- K2tog = knit 2 stitches together, decreasing one stitch.
- Ssk = slip two stitches as if to knit, return them to the left needle and knit them together, decreasing one stitch.
- M1r = Pick up the yarn between the needles with the left needle from back to front. Knit through the front of the loop you created. Increases one stitch.
- M1l = Pick up the yarn between the needles with the left needle from front to back. Knit through the back of the loop you created. Increases one stitch.
- Sl = Slip maker
Cuff:
With the black yarn cast on 56 stitches. Divide between three needles. Join together to form a circle, being careful not to twist the stitches, and place a stitch marker between the first and last stitch to mark your row. Work in k1p1 ribbing for 2 – 2 ½ inches.
Increase for Hand:
K27, kfb, k27, kfb (58 stitches)
Add in the Thumb Gusset:
Start working chart (click on the chart and save it to your computer to get a bigger version)

Row 1: k29, place marker, m1r, k1, m1l, place maker, k28 (60 stitches with 3 between the stitch markers)
Row 2: k29, sm, m1r, k3, m1l, sm, k28 (62 stitches)
Row 3: k
Row 4: k29, sm, m1r, k5, m1l, sm, k28 (64 stitches)
Row 5: k
Row 6: k29, sm, m1r, k7, m1l, sm, k28 (66 stitches)
Row 7: k
Row 8: k29, sm, m1r, k9, m1l, sm, k28 (68 stitches)
Row 9: k
Row 10: k29, sm, m1r, k11, m1l, sm, k28 (70 stitches)
Row 11: k
Row 12: k29, sm, m1r, k13, m1l, sm, k28 (72 stitches)
Row 13: k
Row 14: k29, sm, m1r, k15, m1l, sm, k28 (74 stitches)
Row 15-16: k
Row 17: k29, sm, m1r, k17, m1l, sm, k28 (76 stitches)
Row 18-19: k
Row 20: k29, sm, m1r, k19, m1l, sm, k28 (78 stitches with 21 stitches between the markers)
Row 21-27: k
Row 28: k29, place 21 stitches between stitch markers on a stitch holder, cast on 1 stitch, k28 (58 stitches on needles)
Finish Hand:
Continue following chart
Row 29-52: k
Row 53: ssk, k27, ssk, k27 (56 stitches)
Row 54: ssk, k24, k2tog, ssk, k24, k2tog (52 stitches)
Row 55: ssk, k22, k2tog, ssk, k22, k2tog (48 stitches)
Row 56: ssk, k20, k2tog, ssk, k20, k2tog (44 stitches)
Row 57: ssk, k18, k2tog, ssk, k18, k2tog (40 stitches)
Row 58: ssk, k16, k2tog, ssk, k16, k2tog (36 stitches)
Row 59: ssk, k14, k2tog, ssk, k14, k2tog (32 stitches)
Row 60: ssk, k12, k2tog, ssk, k12, k2tog (28 stitches)
Row 61: ssk, k10, k2tog, ssk, k10, k2tog (24 stitches)
Row 62: ssk, k8, k2tog, ssk, k8, k2tog (20 stitches)
Row 63: ssk, k6, k2tog, ssk, k6, k2tog (16 stitches)
Row 64: ssk, k4, k2tog, ssk, k4, k2tog (12 stitches)
Row 65: ssk, k2, k2tog, ssk, k2, k2tog (8 stitches)
Cut yarn leaving about a 6-inch tail. Thread the tail through the remaining stitches. Bring tail to the inside and pull tight. Weave in ends.
Thumb:
Put the stitches from the stitch holder onto two needles. With third needle, pick up and knit two stitches from the hand at the gap. Place stitch marker. Pick up and knit one more stitch. Total of 24 stitches on the needle (You can move the stitches around to make them a little more even on the needles.)
Row 1: The last stitch you picked up and knit is the first stitch of this row after it knit 20 stitches, k2tog, k1 (23 stitches)
Row 2: k2tog, k 21 (22 stitches)
Work straight until the end of the chart.
Shape Thumb Top:
Row 1: k5, k2tog, k5, k2tog, k6, k2tog (19 stitches)
Row 2: k4, k2tog, k4, k2tog, k5, k2tog (16 stitches)
Row 3: k3, k2tog, k3, k2tog, k4, k2tog (13 stitches)
Row 4: k2, k2tog, k2, k2tog, k3, k2tog (10 stitches)
Row 5: k1, k2tog, k1, k2tog, k2, k2tog (7 stitches)
Cut yarn leaving about a 6-inch tail. Thread the tail through the remaining stitches. Bring tail to the inside and pull tight. Weave in ends.
If you find any errors in this pattern please let me know.
Copyright 2012 Kathy Lewinski
www.justcraftyenough.com
Do no sell or duplicate this pattern. Do not sell items made with this pattern. Do not teach this pattern without my permission. Thank you.
© 2005 – 2012 Kathy Lewinski & Susan Cornish

Pingback: 8 μοτίβα πλεξίματος με γάντια Αγίου Βαλεντίνου - Poncil