

So, as you saw yesterday, my first project idea for the Iron Craft theme of money was a fail. Luckily, I had another project in mind that I could do easily in one afternoon. It seems we always have a little foreign money left after every trip which is the perfect addition to the shadow boxes I’ve been planning to make of each of our major vacations. We take a lot of photos while traveling but, they end up sitting on our computers and on Flickr. I would like to display them but one photo doesn’t really encompass the feeling of a whole trip. A shadow box allows me to display a couple photos as well as 3-D objects from wherever our travels took us. I decided to work on the India box first (we went in the fall of 2009 so, it’s about time!).
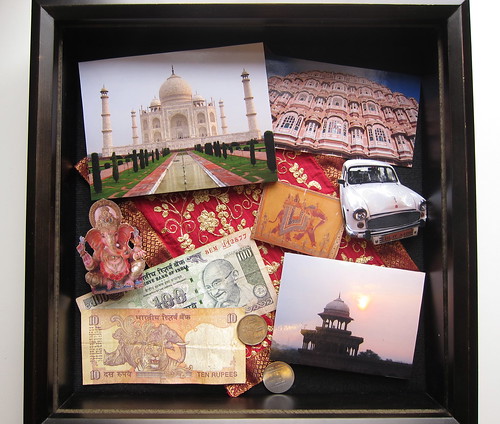
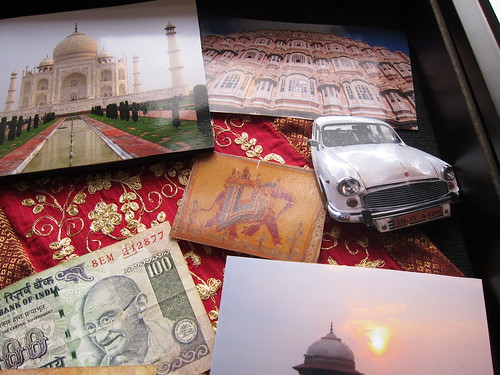
In the box – Taj Mahal, Hawa Mahal, our Ambassador, painting from the Nahargarh Fort, Ganesh idol, rupee bills & coins, sunrise from the Taj Mahal all on top of embroidered fabric.
Such a simple project and I love the results. I think a group of these on the wall from different countries is really going to make for an interesting vibrant display.
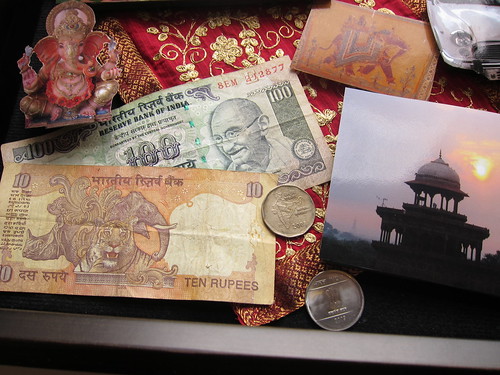
Love the fact the bottom coin says India 2009
Here’s how I made it along with a few things I learned along the way…
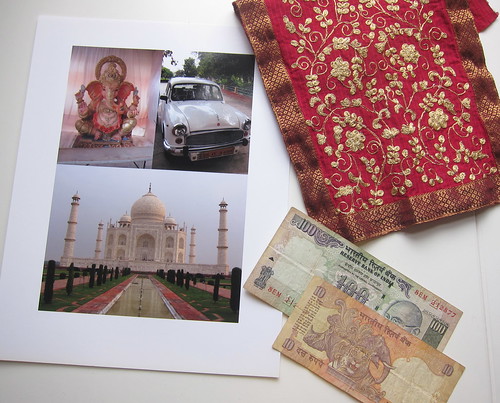
For this box I had some rupees, a couple hundred pictures & some beautifully embroidered fabric to work with. I printed out a few pictures to play with at home on photo paper. Some I kept whole and a few others I cut out the main image for more visual interest in the finished box. Tiny embroidery scissors really helped with the fussier cuts.
My shadow box was 12″ x 12″ and 1 1/2″ deep with a velour backing (plus 40% off this week at Joann’s which was a score because these normally cost $36, need to go get more).
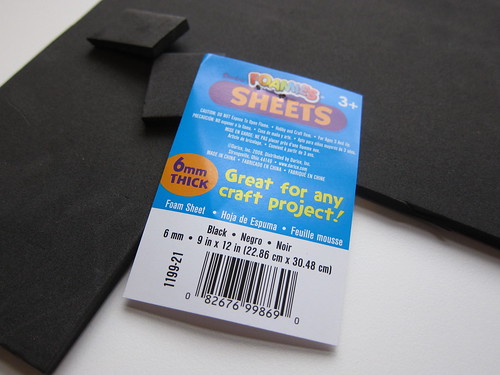
I also bought this 6mm foam sheet at the craft store. I love the fact in comes in black so it basically just fades away in the box. It cuts really easily with scissors. I cut small squares which I glued together in stacks so different things could be at different heights. For whole pictures I cut the foam to size to back them.
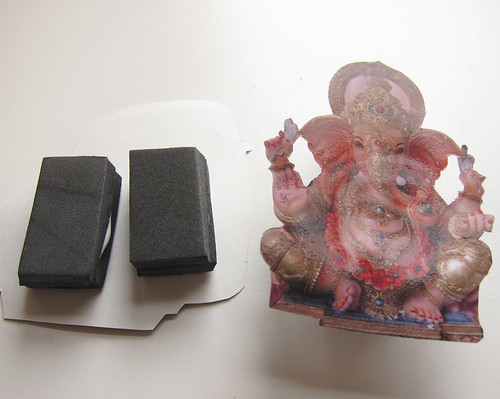
I needed a variety of glues and tape; styrofoam glue for the foam pieces, double-sided tape for the photos, fabric glue for the fabric and super glue for the coins. I tried gluing the photos to the foam and it really made them pucker, double-sided tape was totally the way to go.
Assembly was pretty easy. Full pictures that were going to be raised from the background were taped to foam pieces cut to the exact size (this will keep them from bending over time). I laid out my fabric then just played with the placement of all the other pieces. I varied the height of things by making them one, two or three pieces of foam high. Once I was happy with the layout everything was adhered with the appropriate glue or tape.
Now I just need to do London, Amsterdam and Belgium…
© 2005 – 2011 Kathy Lewinski & Susan Cornish

Pingback: DIY : Que faire de vos photos et souvenirs de voyages ? | Let's feel infinite