


Every Friday for the twenty-four weeks leading up to December 1st, we will be making a handmade Christmas ornament. Follow along and make them all or pick and chose your favorites.
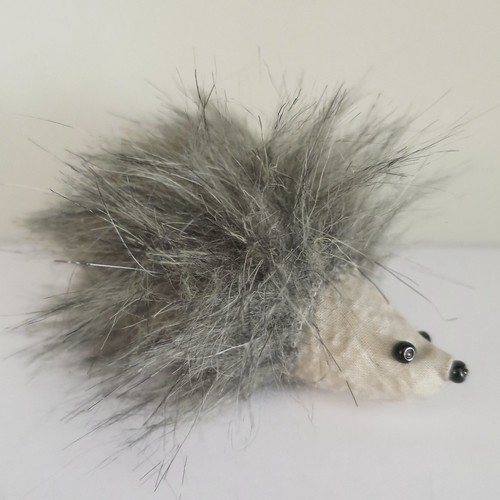
This week’s ornament was inspired by my hedgehog crazy friends in the UK.

One of them posted a picture of a hedgehog toy and I realized the shape wasn’t that different from a sideways cone. Well, I just happened to have a few of those cones in my stash.
It took me a little time to figure out the right shape for the fur to cover the back and butt of the hedgehog, but once I had it this was pretty easy. I’ve put a pdf of a template to make that piece, so it is even easier for you!
Hedgehog Ornament
Download the Hedgehog Ornament Fur Template
Supplies:
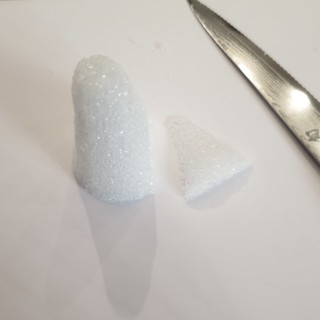
- 2″ x 3″ styrofoam cone
- serrated knife
- 6″ x 6″ square of fabric
- scissors
- straight pins
- thread to match fabric
- sewing machine or hand sewing needle
- glue for styrofoam
- small paintbrush (optional, but is great for spreading the glue)
- 6″ x 6″ of faux fur
- 3 black beads
- black Sharpie
- small eye screw
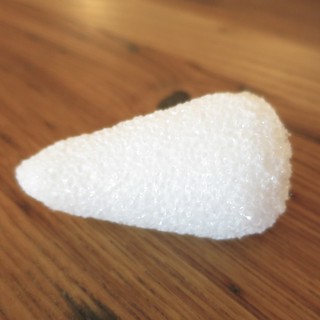
1. Shape the styrofoam cone – Using the serrated knife cut a little off one side of the cone for a flat base. You are not cutting the cone in half, you are cutting just enough to let it sit flat but still have the point off the ground. This flat part will the bottom of the hedgehog.
 <
<
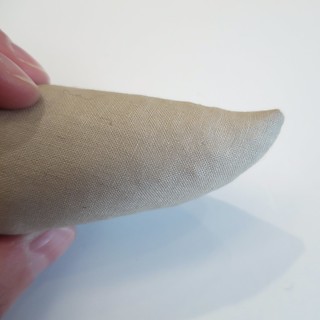
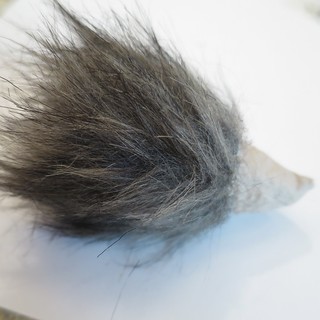
Trim a little off the wider end of the cone to round it off slightly, this will be the rear end of the hedgehog. The styrofoam on these cones is typically soft enough that you can do some shaping with your fingers with a little pressure. I did this to make those rounded edges a little smoother as well as make the tip/nose slightly pointier and more upturned.
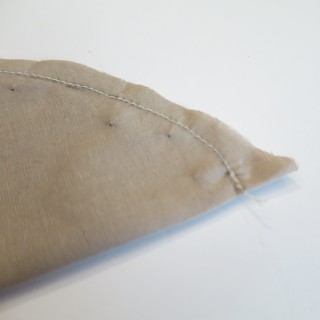
2. Cover with fabric – With the fabric wrong side out, form a cone shape with the fabric to go around the foam. You will be leaving the back, wider end, open. The seam of the cone should be centered on the flat bottom. Pin to mark where you will be sewing the seam. The point of the fabric cone will not be pointy, but a little straighter to mimic the foam shape underneath.

Sew the seam with matching thread either with a sewing machine or by hand. Trim the seam allowance.
Turn right side out. Put a thin layer of glue on the foam and slide the fabric in place with the seam centered down the middle. (I didn’t do great at getting it centered, but it still worked.)
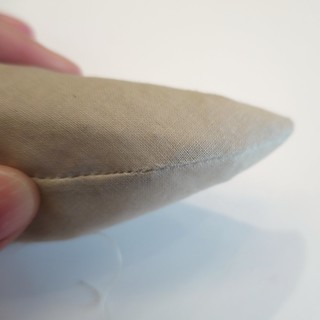
Trim any excess fabric at the back of the cone so it ends just around the curve. You want the bottom to be completely covered as it will show, but the back and rear end will be covered in fur.
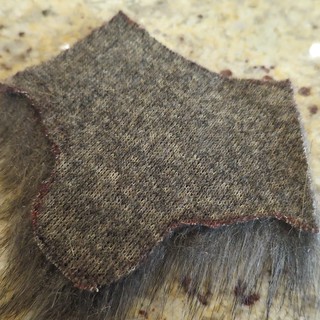
3. Add the fur – Use the template downloadable above to cut the fur. (*see Note) If you cut from the back and just through the backing, you’ll have less mess and won’t cut the fur at the edges.
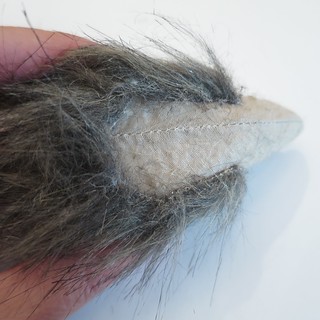
Put a layer of glue on the rear end and glue the the round part of the fur piece in place covering the edges of the fabric. You want to place the fur so the rest of it will fold over the back of the hedgehog towards the nose. Make sure it is centered.
Glue the rest of the fur in place. The flat bottom and the head will be the only parts not covered in fur.
(You can really see here how my seam wasn’t centered.)
I found it didn’t want to stick at first, so a few straight pins helped until it was dry.
You can trim the fur a little to give it more shape or make it a little shorter, but keep in mind the fur hides some seams at the back.
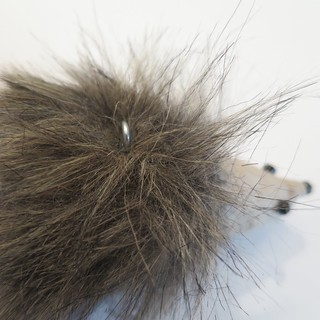
4. Add the face – Using straight pins to hold them in place, put the beads where you want them for the eyes and nose. You will be leaving the pins in so make sure to point the pins towards the back of the hedgehog. Once you have them where you want them, pull the pin out a little and put some glue on it and the back of the bead. Press into place.
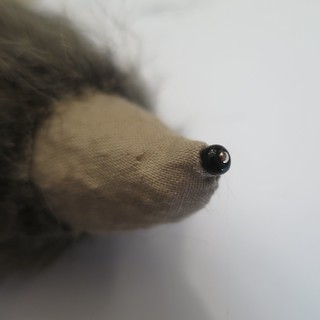
Use a black Sharpie or other permanent marker to color the end of the pin.

5. Add eye screw for hanging – Find the center spot on the back of the hedgehog. Move the fur away from that point. Put a little glue on the screw end and screw into the back. Make sure it is facing the right direction for how you want to hang your hedgehog.
*Note: If I did this again I would only make one change, I would have the fur go further up the back towards the face, maybe about 1/4″. I added that 1/4″ in the template, so you can decided which way to go yourself.
© 2005 – 2015 Kathy Lewinski & Susan Cornish


