


(For the 24 weeks leading up to December 1st, we’ll be making a Christmas ornament, giving you enough to fill an advent calendar.)
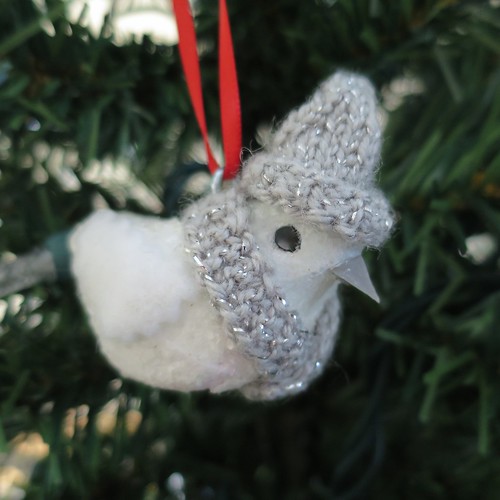
Here we are at the last of the ornaments for 2014. (Well, for this project anyway.) This week’s ornament was inspired by some larger decorative birds I saw a Target. The Target ones were about 6″ – 7″ tall for standing on a shelf or mantle. I made a much smaller version to hang on the tree.
This project was made very easy thanks to a cheap fake bird for floral displays that I found at the dollar store. (My local dollar store seems to have these all the time and you get two for $1.)
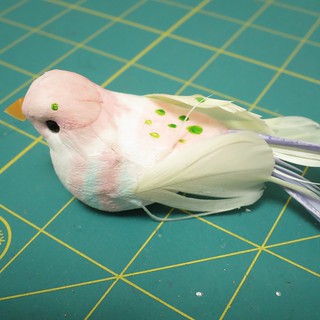
If you can’t find something like this, you could also make a body from sculpting clay. I used Fimo light for this one.
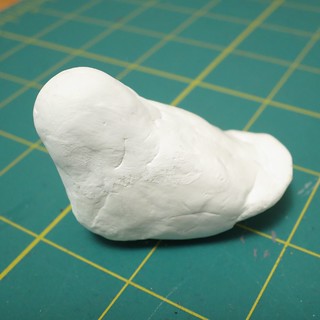
In this version, you would have to add your own beak and eyes. The instructions below will be for using a pre-made bird body.
Snow Bird Ornament
Supplies:
- fake bird body
- white acrylic paint
- white glitter
- mod podge
- paintbrush
- white felt
- scissors
- pinking shears (optional)
- fingerling yarn (or felt or scrap fabric)
- knitting needles, if knitting hat and scarf (I used size 1)
- glue such as tacky glue
- eye screw
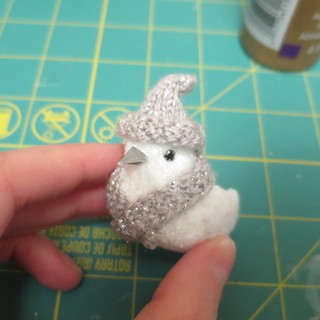
1. Cut the wings and tail off the bird, if it has them. Paint the bird white except for the beak and eyes. You make need to do more than one coat especially to cover reds and pinks. Cover the body with glue and roll in the white glitter. Let dry. Then seal with Mod Podge.
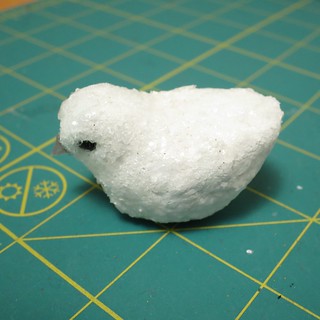
You’ll have a sparkling little white bird. (You could use a glitter paint for this step but I find it doesn’t give the same sort of texture or sparkle.)
2. Cut wings from white felt. I used pinking shears to add a little texture to them.
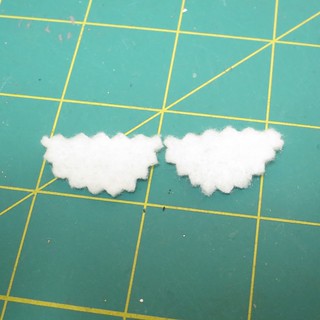
Glue to the side of the bird.

3. Make a small hat and scarf. I knit mine. The scarf was just 4 stitches wide and done in garter stitch. I slipped the last stitch of each row for a smooth edge. I knit the hat in the round on 24 stitches. I did two rows in ribbing and the two rows knit. Then I decrease 4 stitches evenly on each row until 4 stitches remained. I turned the ribbing up on the hat for a brim. You will need to wing it to make a hat the fits your bird correctly.
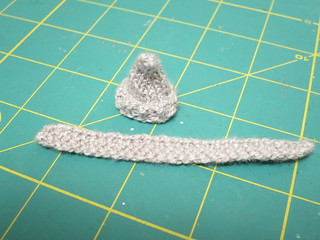
The ones at Target had hats and scarves made from plaid flannel and plain felt, so if you don’t knit this would be easy to do instead.
Glue the hat and scarf into place. You may want to add a little stuffing into the hat before gluing it on, it really depends on your hat.
4. Figure out the best hanging point for your bird and screw in an eye screw for hanging.
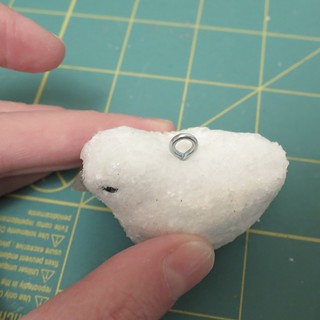
I did this before I attached everything else only to discover I needed to take it out to put the scarf on, so wait until everything else it on before doing this step.
© 2005 – 2014 Kathy Lewinski & Susan Cornish

2 Comments to Advent Calendar Project ’14 – Week 24