

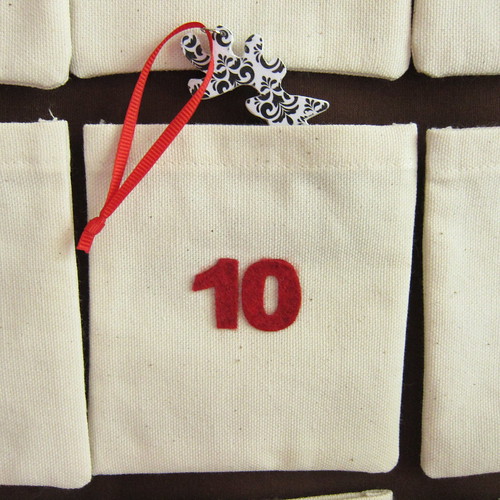
(Every week until December 1st we will be making a small Christmas ornament that can be used in our Pocket Advent Calendar. Join us in making all 24 or just pick and choose your favorites.)
Last year Ikea had patterned reindeer gift tags that I thought would make really striking ornaments, but they were just made of cardboard. I wanted to make something with a similar look that would be a little sturdier.

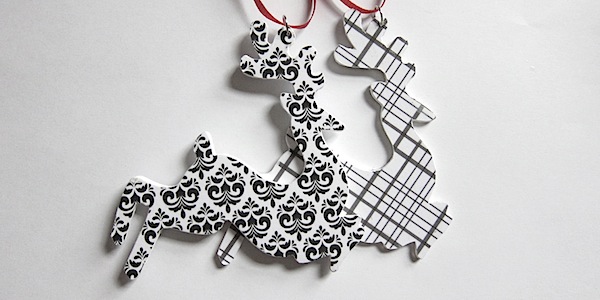
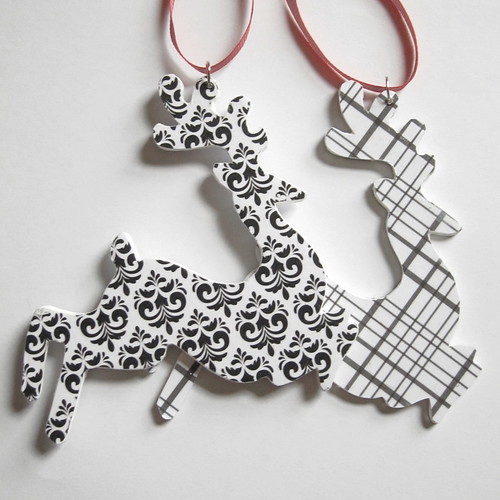
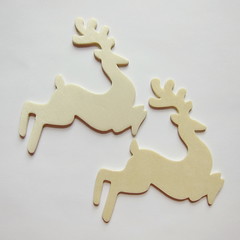
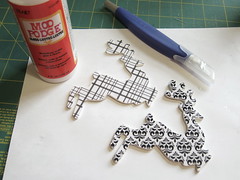
I found these great wooden reindeer cut-out at Michael’s for only $0.29 each. Then, it just took some scrapbook paper and a little Mod Podge to get the look I was going for. I made them two-sided with a plaid on one side and damask on the other. I think the damask looks especially gorgeous. You can, of course, use any design that matches your decorating scheme.
Patterned Reindeer Ornaments
Supplies:
- wooden reindeer cut-outs
- patterned scrapbook paper (You want the thinner type, not the cardstock)
- acrylic paint that matches the paper
- small paint brush
- Mod Podge
- flat or foam paint brush (a foam brush will give you a smoother finish)
- exacto knife
- sharp medium width sewing needle
- small jump ring
- ribbon
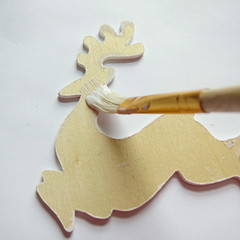
1. If the edges of your cut-outs are rough, sand them with a little fine sand paper. With a small paint brush, paint the edges of the cut-outs. You may want to do two coats. Let dry.
2. Paint one side of the cut-outs with a medium coat of Mod Podge. You want it completely covered. Be careful to not let the Mod Podge pool in the details of the cut-outs.
3. Press on to the back side of the scrapbook paper Mod Podge side down. Smooth out any bubbles. You may want to put a book or something heavy on top while it dries. Make sure it is adhered everywhere or else it will bubble when you put on the top coat of Mod Podge.

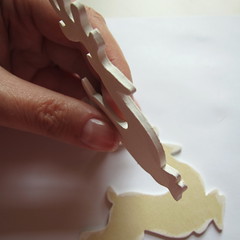
4. Using the exacto knife, carefully cut around the edge of the reindeer. This is pretty easy because you can press the knife up against the side of the cut-out.

5. Repeat sets 2 – 4 for the second side of the reindeer with either the same scrapbook paper or another coordinating pattern.
6. Carefully touch up any of the paint at the edge if needed. (I had scraped a little off with the exacto knife.)
7. With the flat or foam brush, coat one side of the decorated reindeer with a light layer of Mod Podge. Let dry and add a second coat. Once that side is dry, repeat on the other side.
8. Use the medium needle to poke a hole through the top of the reindeer’s antlers. Put a jump ring through the hole. Loop a ribbon through the jump ring for hanging.

As much as I like this ornament on the tree, I can help but imagine how great it would look on a package wrapped in a solid color.
© 2005 – 2012 Kathy Lewinski & Susan Cornish


Pingback: The Advent Calendar Project Week 22 Felt Owls · Felting | CraftGossip.com