
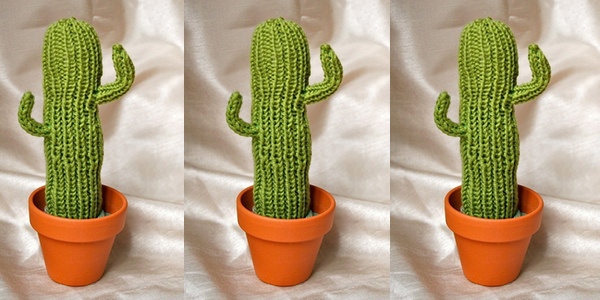


People really showed us the love for the knit pin cushion cactus. So I thought I would give you the next in the series, The Saguaro Cactus. This pattern is a little bit more in depth than the last one. But, if you have knit socks, you have enough skill to tackle this.

saguaro cactus (Carnegiea gigantea)
Saguaro Cactus Pattern
(Click here to download a printable copy of the Saguaro Cactus Pattern)

Supplies:
- Yarn: Small amount of any green fingering weight yarn. Shown here in Dale of Norway Baby Ull.
- Needles: 4 double pointed needles appropriate size to get gauge. Shown here knit using size 3 double pointed needles.
- For the branch, I used another set of DP sock needles. (they are short, and make it easy to maneuver around.)
- Fiber fill
- Finishing needle (aka: tapestry needle)
- 1 green pipe cleaner
- Pot: shown here 9 inches in circumference around the outside of the top, 2.5 inches tall.
Gauge: 8 stitches per inch
Abbreviations:
- K = knit
- P = purl
- K2tog = knit two stitches together (this is decrease by one stitch)
Pattern:
(Do a gauge swatch with your yarn. The directions given below fit my pot, my yarn, my tension.)
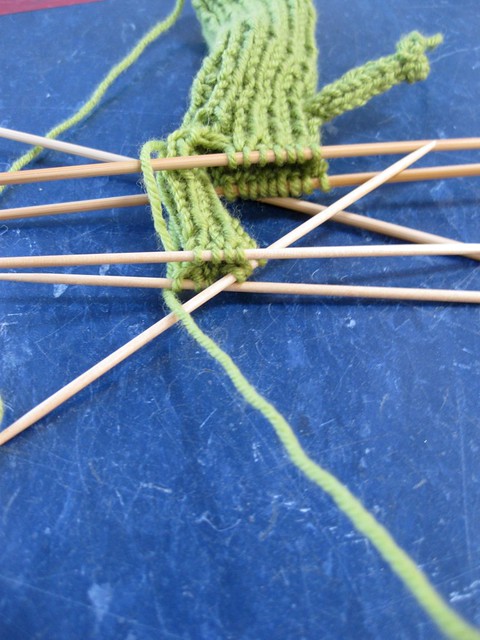
Cast on 24 stitches. Divide onto 3 needles. Join in the round, being careful not to twist your stitches.
Work in a rib pattern, knit 1 purl 1 for 26 rounds.
Form the first branch. Knit twice into the next two stitches. These 4 stitches will be the branch. They will be done in an i-chord. (i-chord means you do not turn your work. Here is a nice video tutorial.)
Work these stitches for 10 rows. Bind off all stitches. Cut the yarn off with just a short tail (3 inches is enough.) Thread it into a tapestry needle, and pull it down into the middle of the branch you have just created.
Reattach the yarn at the point 3 stitches before the branch, and knit (in pattern) 3 stitches. Then, above where the branch is attached, you will pick up 2 stitches (in pattern) so that there is not a hole in the trunk. Continue to knit in the K1 P1 pattern for another 6 rounds.
Time to start another branch. Work in pattern until you are approximately 1/2 way around from the other branch. Knit three stitches into the next 3 stitches, and then cast on one more stitch. (10 stitches). Divide these 10 stitches onto 3 needles. (Here is where I used the extra set of sock DP needles.) Work these 10 stitches in the round for 16 rows.
In the next row K2tog all the way around. (5 st left) Break the yarn, leaving about 6 inches, and thread it through a tapestry needle. Run the yarn through the loops of the 5 stitches, and pull them so cinch them shut at the top. Stick the end down into the branch, in the middle of the stitches.
In the same manner as before, you will continue to knit the trunk of the cactus. Reattach the yarn at the point 3 stitches before the branch, and knit (in pattern) 3 stitches. Then, above where the branch is attached, you will pick up 3 stitches (in pattern) so that there is not a hole in the trunk. Continue to work in the K1 P1 pattern. About 2 rows further up, I reached into the center of the cactus and inserted green pipe cleaners (chenille stems) into the branches to help them hold their shape. Cut two lengths of pipe cleaner, one about 3 inches and one about 4 inches. Each about an inch longer than the arm it was going to support. Carefully thread the pipe cleaner up into the arm, and let the end of the arm come out perpendicular
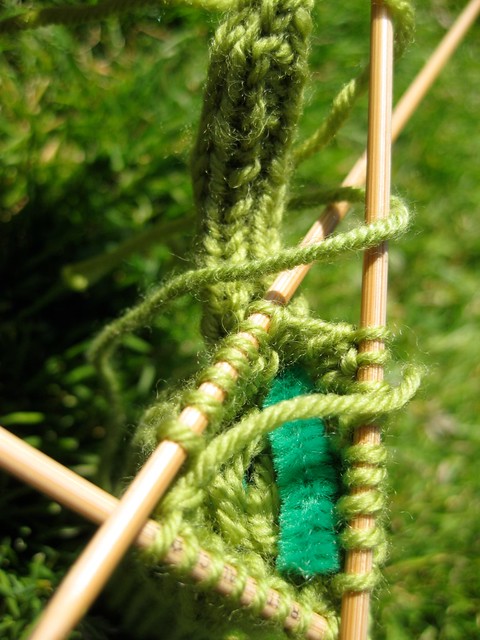
Here you can see the green pipe cleaner is not at all the same color as the yarn. But it does not show through, so it’s okay.
Use fiber fill, and stuff the trunk a little as you go. I tried to really even out the ‘balls’ so that it did not look lumpy. Work 18 rows past the branch. And then K2 tog for two rounds. (6 stitches left) Cut the yarn, leaving about 6-10 inches. Use the tapestry needle, and weave the ends through. The top should close making a nice circle.
This cactus needs to be stabilized in the pot. I took some fabric that I had, and wrapped the base, and just set that in the pot. You could also glue it in. I tried using some fiber fill to raise it up a little bit (and no fabric) but I didn’t like how much of the fiber fill you could see. You could try using some sand or gravel, that would be more ‘desert-like’ for your cactus.

Have fun!
Happy Crafting!
copyright 2012 Susan Cornish
justcraftyenough.com
Please do not sell this pattern. Please do not sell finished product made from this pattern. Please do not teach this pattern without contacting me first. Thank you.
If you are not reading this post in a feed reader or at http://justcraftyenough.com then the site you are reading is illegally publishing copyrighted material. Contact us at justcraftyenough AT yahoo DOT COM. All patterns, text and photographs in this post are the original creations & property of the author unless otherwise noted.
© 2005 – 2012 Kathy Lewinski & Susan Cornish

One Comment to Project: Knit Saguaro Cactus