
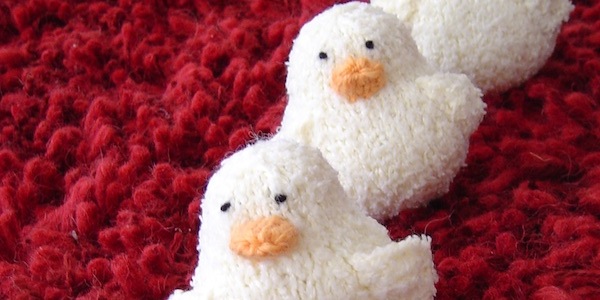

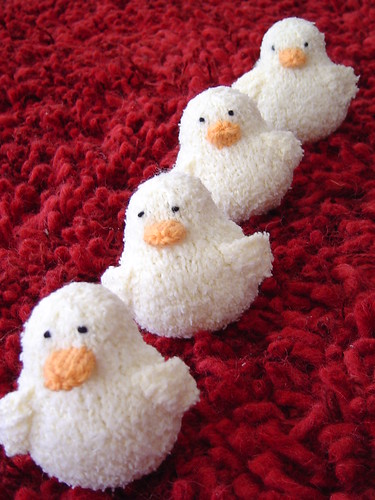
Just in time for filling baskets I share with you my duckling pattern. They look really cute in pale blue & pink too. If you make one I’d love to see it!

Duckling
Supplies:
- Yarn – 1 skein worsted weight yarn in pale yellow (I use Baby Teri yellow), small amount of orange worsted weight yarn, small amount of black yarn
- Needles – four double pointed size 5
- Tapestry needle for finishing
- Stuffing
Gauge: Not important with this at all but you want a tight knit so the stuffing doesn’t show.
Abbreviations:
- k – knit
- kfb – knit front and back – knit a stitch, leaving stitch on left needle; knit into the back loop of this stitch.
- ssk – slip slip knit – slip one stitch, then slip the next. Insert left needle into the front loops of the slipped stitches and knit them together from this position
- k2tog – knit 2 together – knit two stitches together
Body:
Cast on 6 stitches.
Divide them between 3 needles.
Join being careful not to twist
Row 1: kfb all stitches (12 stitches)
Row 2: k
Row 3: kfb all stitches (24 stitches)
Row 4: k
Row 5: kfb, k2, kfb, k2, kfb, k4, kfb, k2, kfb, k2, kfb, k6 (30 stitches)
Row 6: k
Row 7: kfb, k3, kfb, k3, kfb, k6, kfb, k3, kfb, k3, kfb, k6 (36 stitches)
Row 8: k
Row 9: kfb, k4, kfb, k4, kfb, k8, kfb, k4, kfb, k4, kfb, k6 (42 stitches)
Row 10: k
Row 11: kfb, k5, kfb, k5, kfb, k10, kfb, k5, kfb, k5, kfb, k6 (48 stitches)
Row 12, 13, 14, 15: k
At this point you may want to bring your tail from the beginning through the center & tie a small knot on the inside.
Row 16: ssk, k5, ssk, k5, ssk, k10, k2tog, k5, k2tog, k5, k2tog, k6 (42 stitches)
Row 17: k
Row 18: ssk, k4, ssk, k4, ssk, k8, k2tog, k4, k2tog, k4, k2tog, k6 (36 stitches)
Row 19: k
Row 20: ssk, k3, ssk, k3, ssk, k6, k2tog, k3, k2tog, k3, k2tog, k6 (30 stitches)
Row 21: k
Row 22: ssk, k2, ssk, k2, ssk, k4, k2tog, k2, k2tog, k2, k2tog, k6 (24 stitches)
Rows 23-30: k
At this point stuff the body of your duck.
Row 31: ssk, k1, ssk, k1, ssk, k2, k2tog, k1, k2tog, k1, k2tog, k6 (18 stitches)
Row 32:k
At this point use the black yarn to make French knots for the eyes.
Row 33: ssk, ssk. Ssk, k2tog, k2tog, k2tog, k6 (12 stitches)
Break yarn & thread it through all the stitches on the needle. Finish stuffing duck to the top of the head. Pull yarn tight. Make a small knot in the yarn near the top of the head & tuck tail into the body of the duck.
Wings: (make 2)
Cast on 2 stitches leaving a long tail to sew wing on
Row 1: kfb all stitches (4 stitches)
Row 2: k
Row 3: k1, kfb2, k1 (6 stitches)
Row 4: k
Row 5: k1, kfb, k2, kfb, k1 (8 stitches)
Row 6, 7, 8: k
Row 9: bind off
Using tail sew the wings on to each side of the duckling. Sew just behind the decrease lines on either side of the duckling’s chest.
Beak:
Cast on 8 stitches. Divide evenly between three needles
Row 1: k
Row2: k
Row 3: ssk, k2, k2tog, k2 (6 stitches)
Break yarn leaving a 6 inch tail. Thread the tail through the stitches on the needle & pull tight. Bring tail inside the beak & tie a small knot. You can put a little stuffing in the beak if you like. Sew beak on the ducklings face.
(c) Kathy Lewinski 2006
Please do not sell my pattern, claim it as your own or teach it in a store without contacting me.
You may link to it from your blog or site.
Some pattern additions provided by Jen
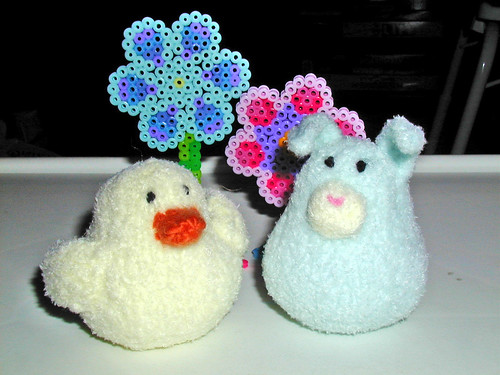
How to turn a duckling into a bunny
Bunny Muzzle:
With a color that contrasts with the body color, CO 6 stitches. Divide among three dpns.
Row 1: kfb all stitches (12 stitches)
Row 2: k
Row 3: kfb, k1, repeat to end (18 stitches)
Row 4: k
Row 5: ssk, k1, repeat to end (12 stitches)
Row 6: k
Row 7 ssk all stitches (6 stitches)
Break yarn leaving a 6 inch tail. Thread the tail through the stitches on the needle and pull tight. Flatten the muzzle into a puffy circle, and bring the tail through the center to the back and tie a small knot.
With pink yarn, stitch a small “v” for a nose. Sew the muzzle onto the bunny’s face.
Bunny Tail:
Knit as for the muzzle, except before drawing the final stitches tight, stuff the piece lightly. Draw the yarn tight, tie a small knot, then stitch through the puff. Sew the tail onto the bunny’s back end.
Bunny Ears (Make 2):
With same color yarn as body, CO 10 stitches.
Row 1: k5, wrap the next stitch (yarn forward, slip next stitch purlwise, yarn back, slip stitch back to left hand needle). Turn your work.
Row 2: k to end of row
Row 3: k all stitches
Row 4: bind off.
Stitch the ears to either side of the top of the bunny’s head. You’ll find the knitting naturally curves in one direction or the other. You can point the ears in different directions, or both the same way, or whatever gives your bunny the personality and individuality you like.
She also suggests a way to make a comb for the chicks head…
Chick Comb:
With same yarn as for beak (a smooth worsted weight), CO 2 stitches
Row 1: k1, kfb (3 stitches)
Row 2: ssk, k1 (2 stitches)
Rows 3, 5, 7: Repeat Row 1
Rows 4, 6: Repeat Row 2
Row 8: bind off
You now have a small, narrow strip of garter stitch, with tiny points on one edge. Sew this on top of the chick’s head, running from front to back, with the points facing up.
© 2005 – 2011 Kathy Lewinski & Susan Cornish

Pingback: Weekend Link Love – St. Paddy’s Weekend « That's StitchTastic!
Pingback: Easter Peeps: The Healthy Version | Jean Kaori Design Studio
Pingback: Swatchless» Blog Archive » Knit a Penguin
Pingback: Christmas Projects – Part 1 – Ornaments | Serendipity: Life is a Garden
Pingback: Poussin Simon (Little Yellow Duck Project) | Bébé tricot
Pingback: Free Fast Easter Knitting Patterns | In the Loop Knitting
Pingback: Freebie Easter Crochet and Knit Pattern Round-Up | Nittin' Ninja
Pingback: 105 Best Easter Gifts and Easter Basket Stuffers of 2018 | Dodo Burd
Pingback: 105 Best Easter Gifts and Easter Basket Stuffers of 2018 - Dodo Burd
Pingback: Animal Knitting Patterns - The Knit Wit by Shair
Pingback: Best Free Easter and Spring Patterns for Knitters and Crocheters - The Knochet Niche
Pingback: Best Free Easter and Spring Patterns for Knitters and Crocheters