

Long (long long) ago I was given a Christmas gift by a child. This family always gave homemade gifts and they were personal and sweet. It was a little needle book. I have had it all this time, and it served as my inspiration for this next project.
This project is super fast and easy. It is appropriate for kids. The toughest part is how nicely you would like to do the finishing. So if you were okay with rougher edges then the age and skill level can go lower.
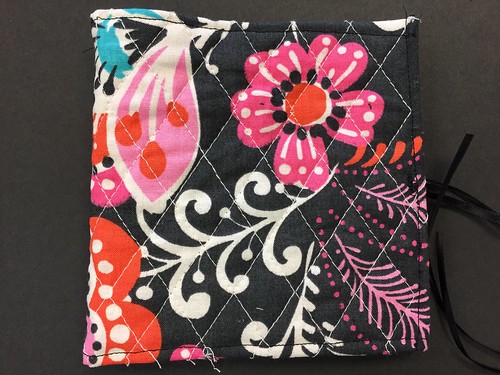
Little Needle Book
Supplies:
- double sided quilted fabric (6″x12″) (Jo-Ann offers a whole range of double-sided quilted fabric – inspired, it appears, by Vera Bradley Bags)
- felt (10″ x 4.5″)
- scissors
- ribbon (21″)
- thread
- disappearing ink pen
- ruler
- hand sewing needle or sewing machine
Directions:
Cut a piece of the quilted fabric 6″ x 12″ (Size does not really matter here, you can decide how big or how delicate and small you would like to make your book)
Place the side you want to be the inside of the book up on the table. This fabric has three layers, a top layer, a fluffy batting layer and a bottom layer. You will get rid of some of the layers to make it easier to turn a hem down all the way around. In order to do that, seam rip or cut a few of the quilting stitches that hold all the layers together. Be conservative here. When you pull a few out, more will follow, so go easy.
Cut away a small amount of the top layer of fabric and the quilt batting. (I worked with 1/2″, but 5/8″ would be good too.)
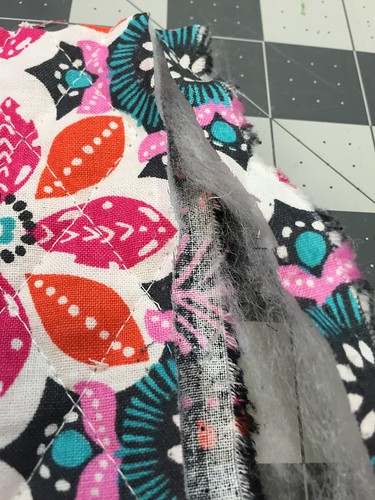
To make this job a little bit easier, I drew a line with disappearing ink and a ruler on the top fabric. Then I followed that line to make my cut. This step is tricky. The scissors get caught in the fuzz of the batting and then the bottom fabric wants to come along with you. Make tiny cuts and check ALL the time to make sure that you do not catch the bottom fabric in your scissors.
Next, work your way around the edges folding the fabric “top” fabric down and making a boarder all the way around.
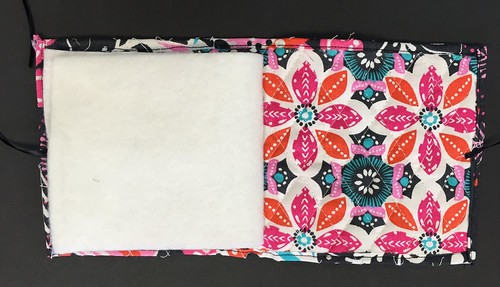
Cut a felt rectangle 10″ x 4.5″.
Fold the book in half and mark the middle. Fold the felt in half and mark the middle line. Sew the felt down onto the book making sure the line match up.
If you are giving it as a gift, it would be nice to add a few needles and/or pins to give the recipient a little head start.
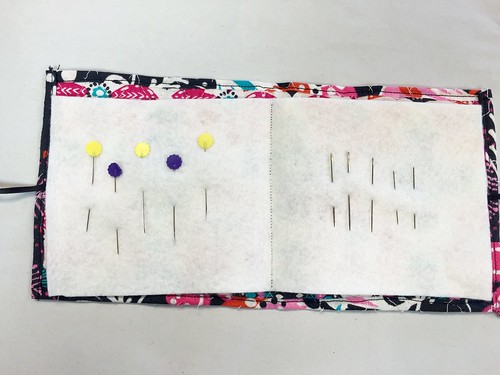
Take about 21″ of accent trim or ribbon, cut it in half, and attach it to the edge to tie shut.

© 2005 – 2015 Kathy Lewinski & Susan Cornish

