

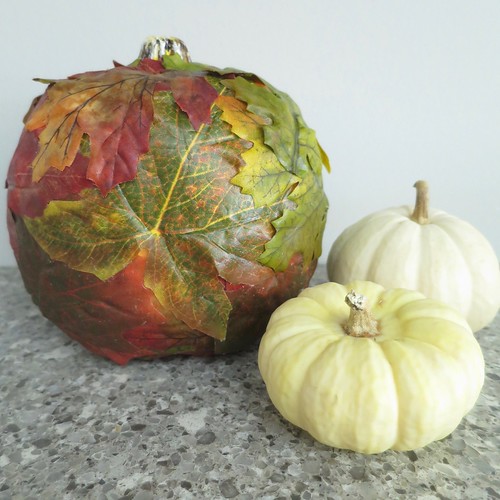
For this Iron Craft challenge we were to craft using the colors of fall. I didn’t just use the colors, but also fall leaves and a pumpkin…well, fake ones.
Recently, I had gone poking through some antique stores and ran across this leaf covered pig.
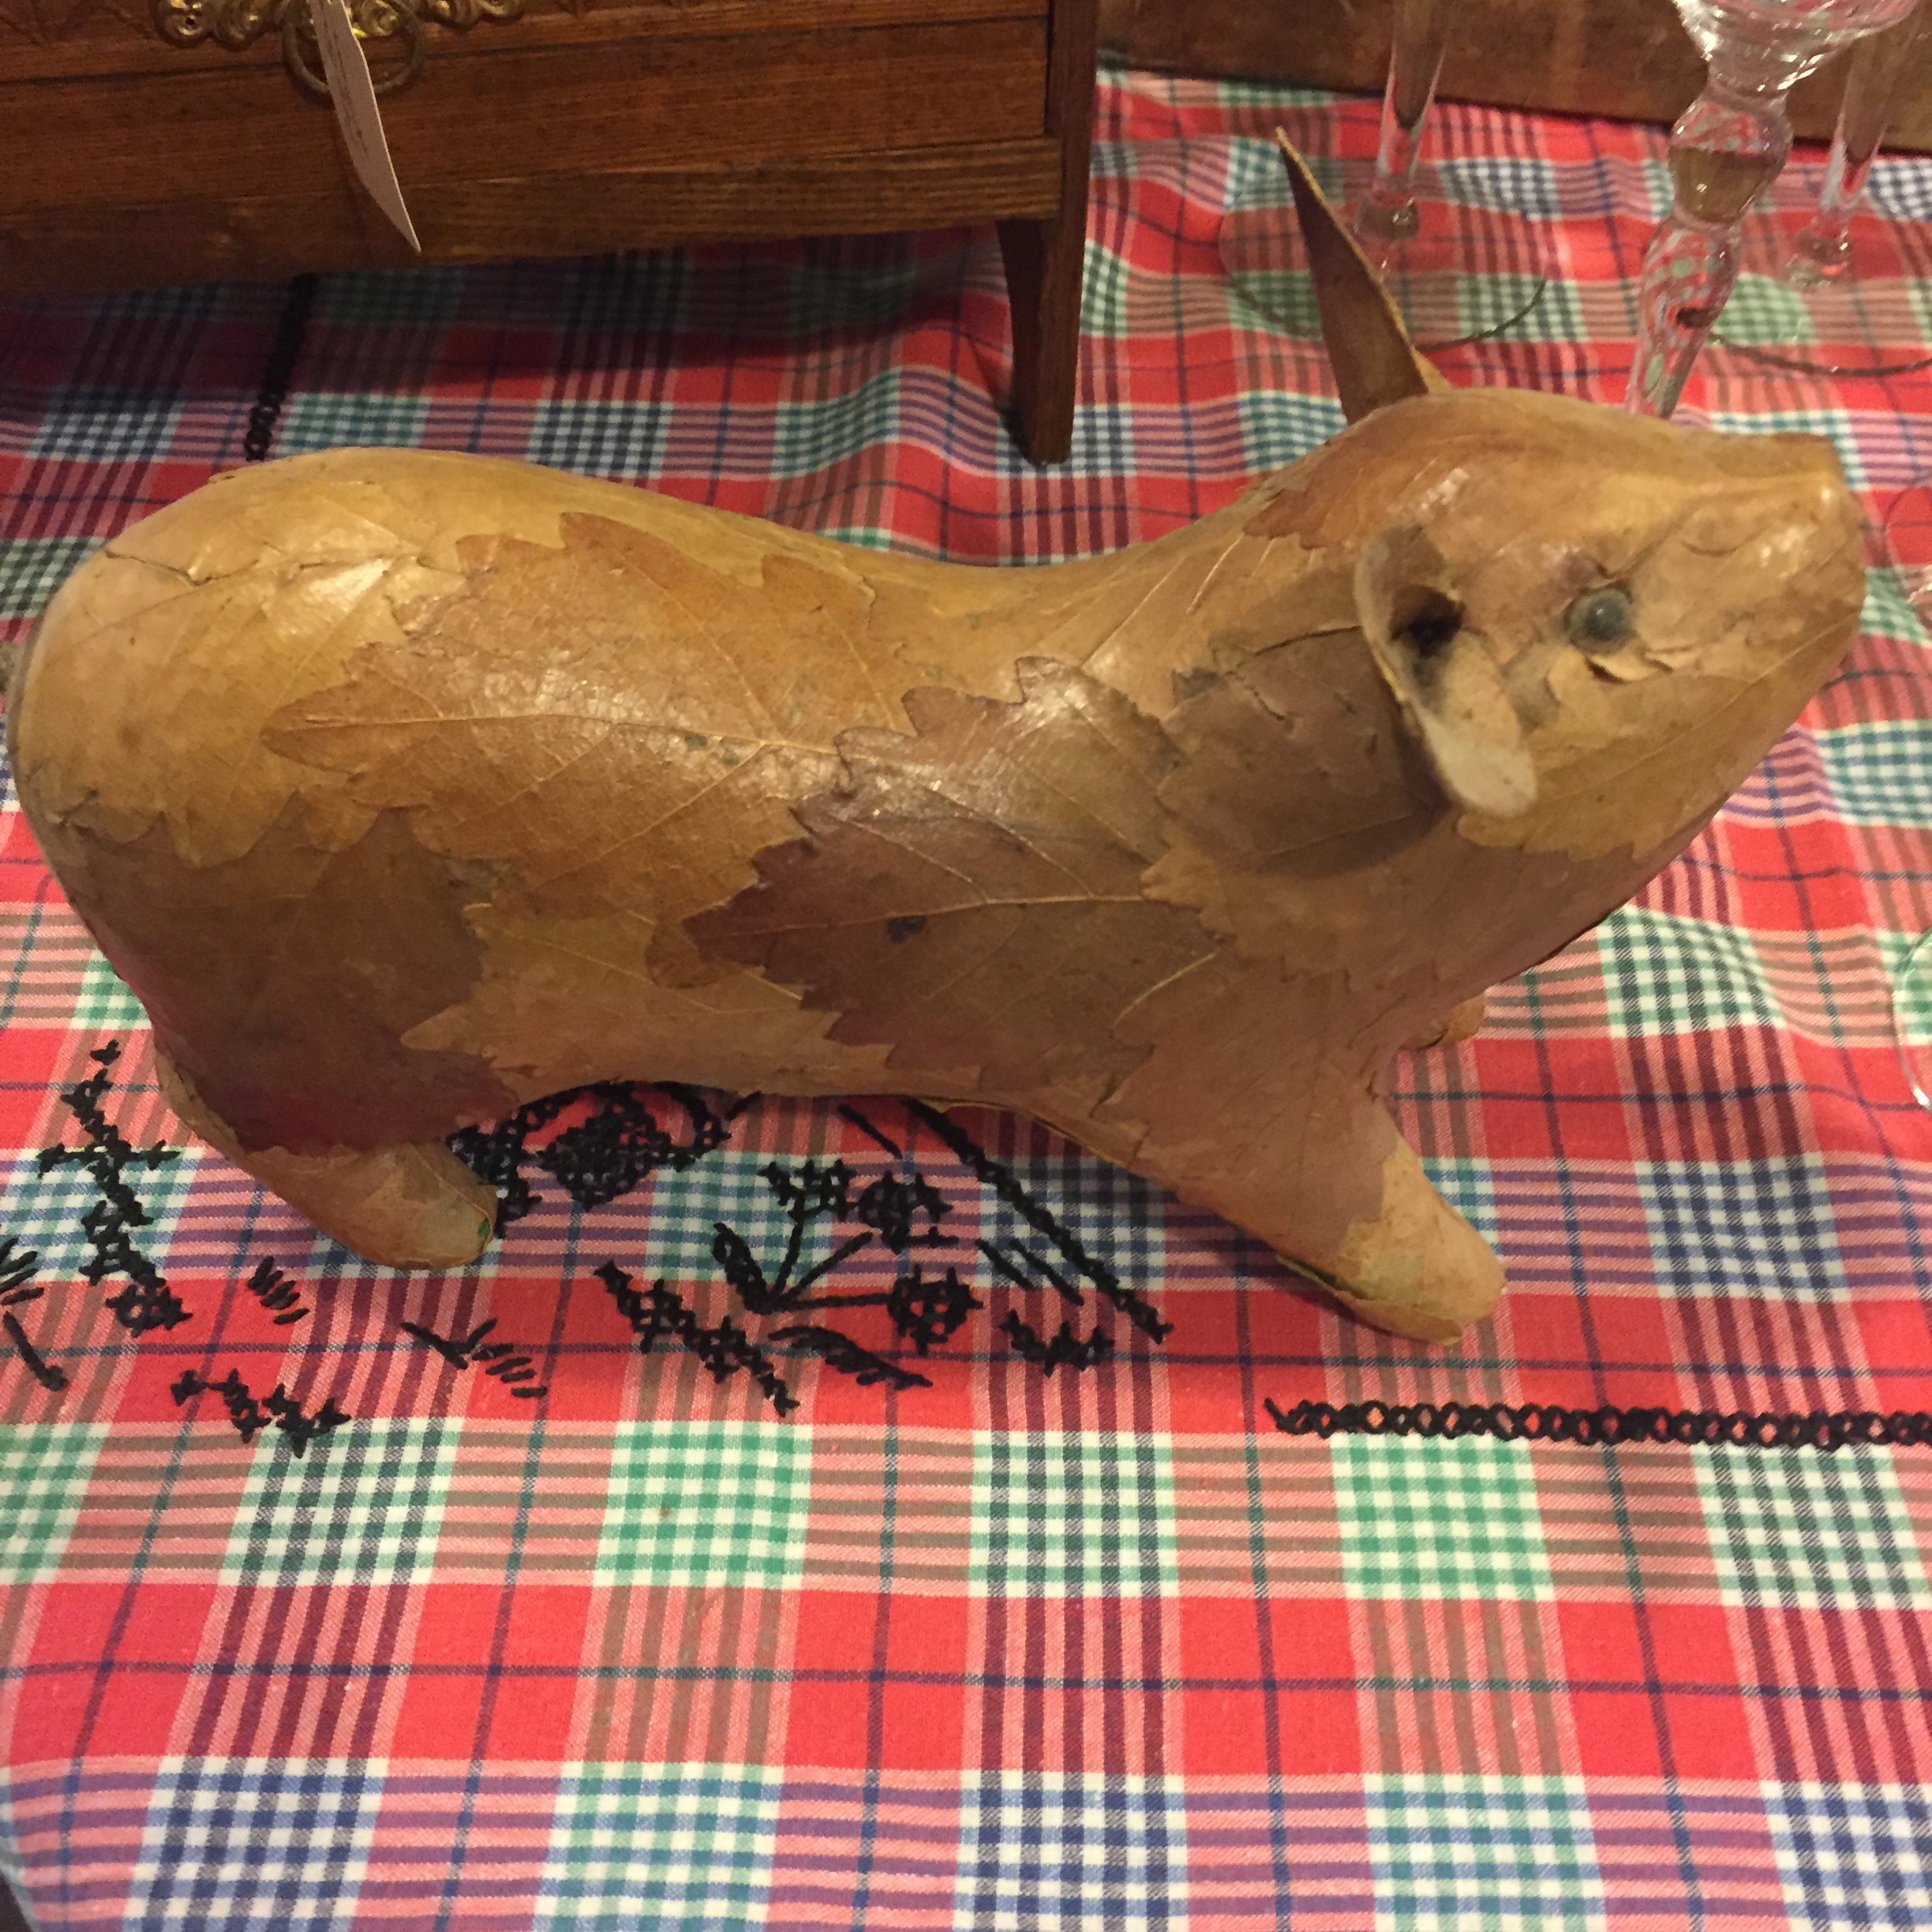
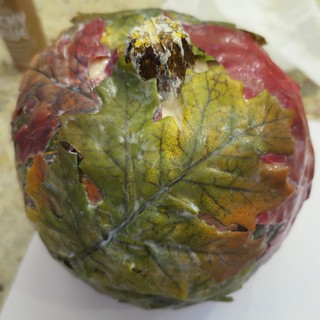
It was an odd little thing, but gave me the idea to cover a pumpkin with leaves.
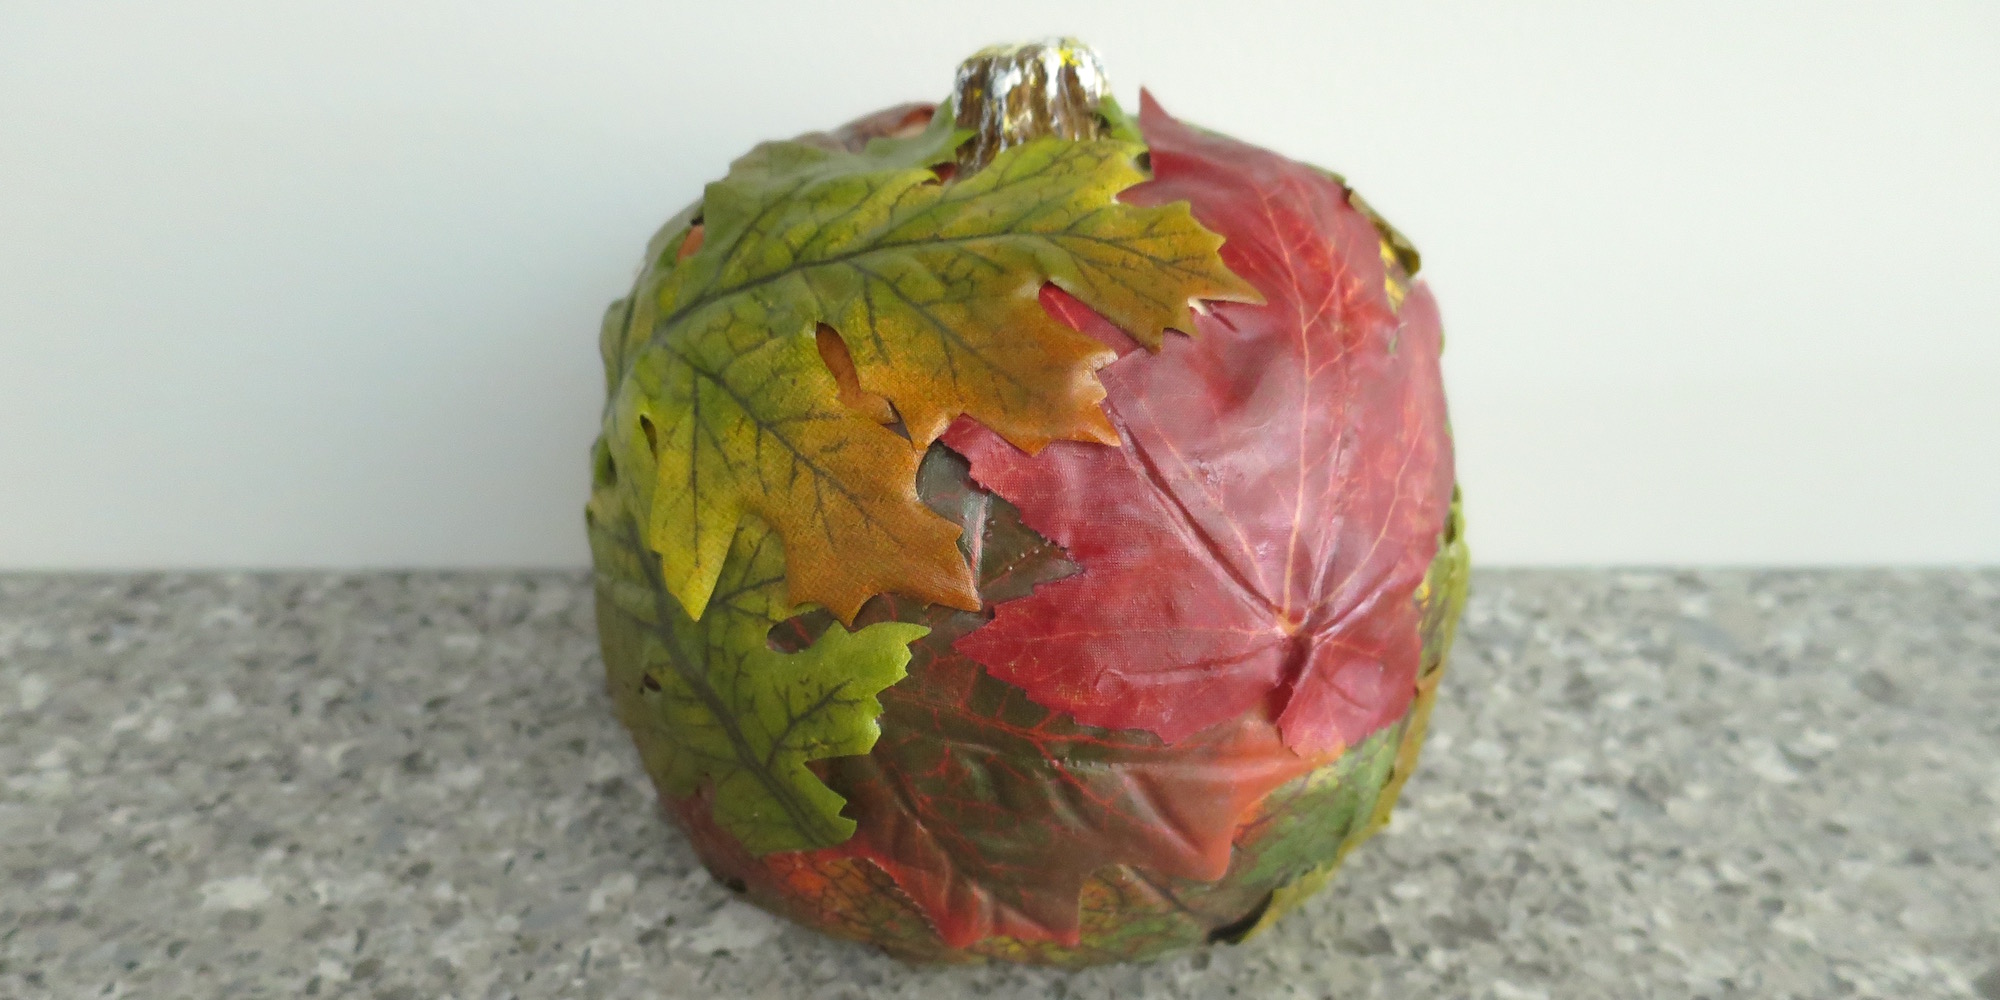
It seemed like an easy project, but the pumpkin is plastic and the leaves are plasticy which made getting them to stick on the the pumpkin flat tricky. (Susi discovered the same thing when making leaf covered candle jars.) It helped to keep pressing them down from time to time while they are drying. Adding a coat of Mod Podge to the top made some of the ends stick out a little, but I actually don’t mind that little bit of texture.
A note about the leaves: If I was going to do this again, I might look for paper leaves like you sometimes see in baking stores. These plasticy leaves worked in the end, but make sure you look for some that you can take any plastic veining off of as that does help make them flatter.
Leaf Covered Pumpkin
Supplies:
- faux pumpkin
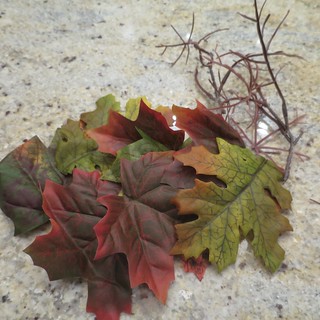
- faux fall leaves
- tacky glue
- paintbrush
- glossy Mod Podge (optional)
1. If your leaves have plastic “veins” remove them is possible. Mine peeled right off.
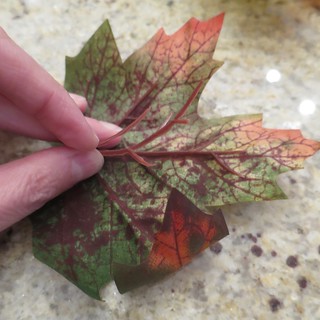
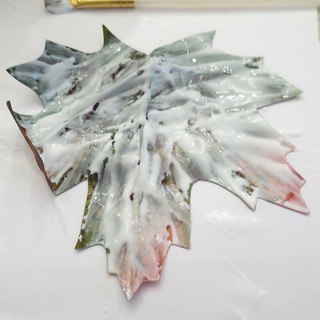
2. Lay a leaf upside down on your work surface and use a paintbrush to cover the back with a layer of glue. Make sure to get paint to all the ends.
Starting at the bottom of the pumpkin, glue on leaves overlapping them to cover the pumpkin.

I tried to vary the colors of the leaves as much as possible. Continue adding leaves until as much of the pumpkin is covered as you’d like. The leaves want to pop off so keep pressing them down as you work. Let Dry.
3. If you want a slightly shiny finish, add a coat of glossy Mod Podge over the leaves. I started with a paintbrush, but found I got a smoother surface just using my fingers.
Let dry.
© 2005 – 2015 Kathy Lewinski & Susan Cornish

These are fantastic. Just a couple of helpful suggestions:
If you cover the base item with gesso (any color would work) you then give the base a tactile surface upon which the glue can stick. Also, if you make small relief cuts in the leaves when you mount them to the rounded surface, it become less likely to pop up. The relief cuts will disappear when the material dries flat.
Another great project.
Oh, thanks for the suggestions. I’ve never tried gesso before.
This looks like a fun project. It looks great. Dr.Russ, great suggestions, especially the one about cutting little incisions to keep things flat.