
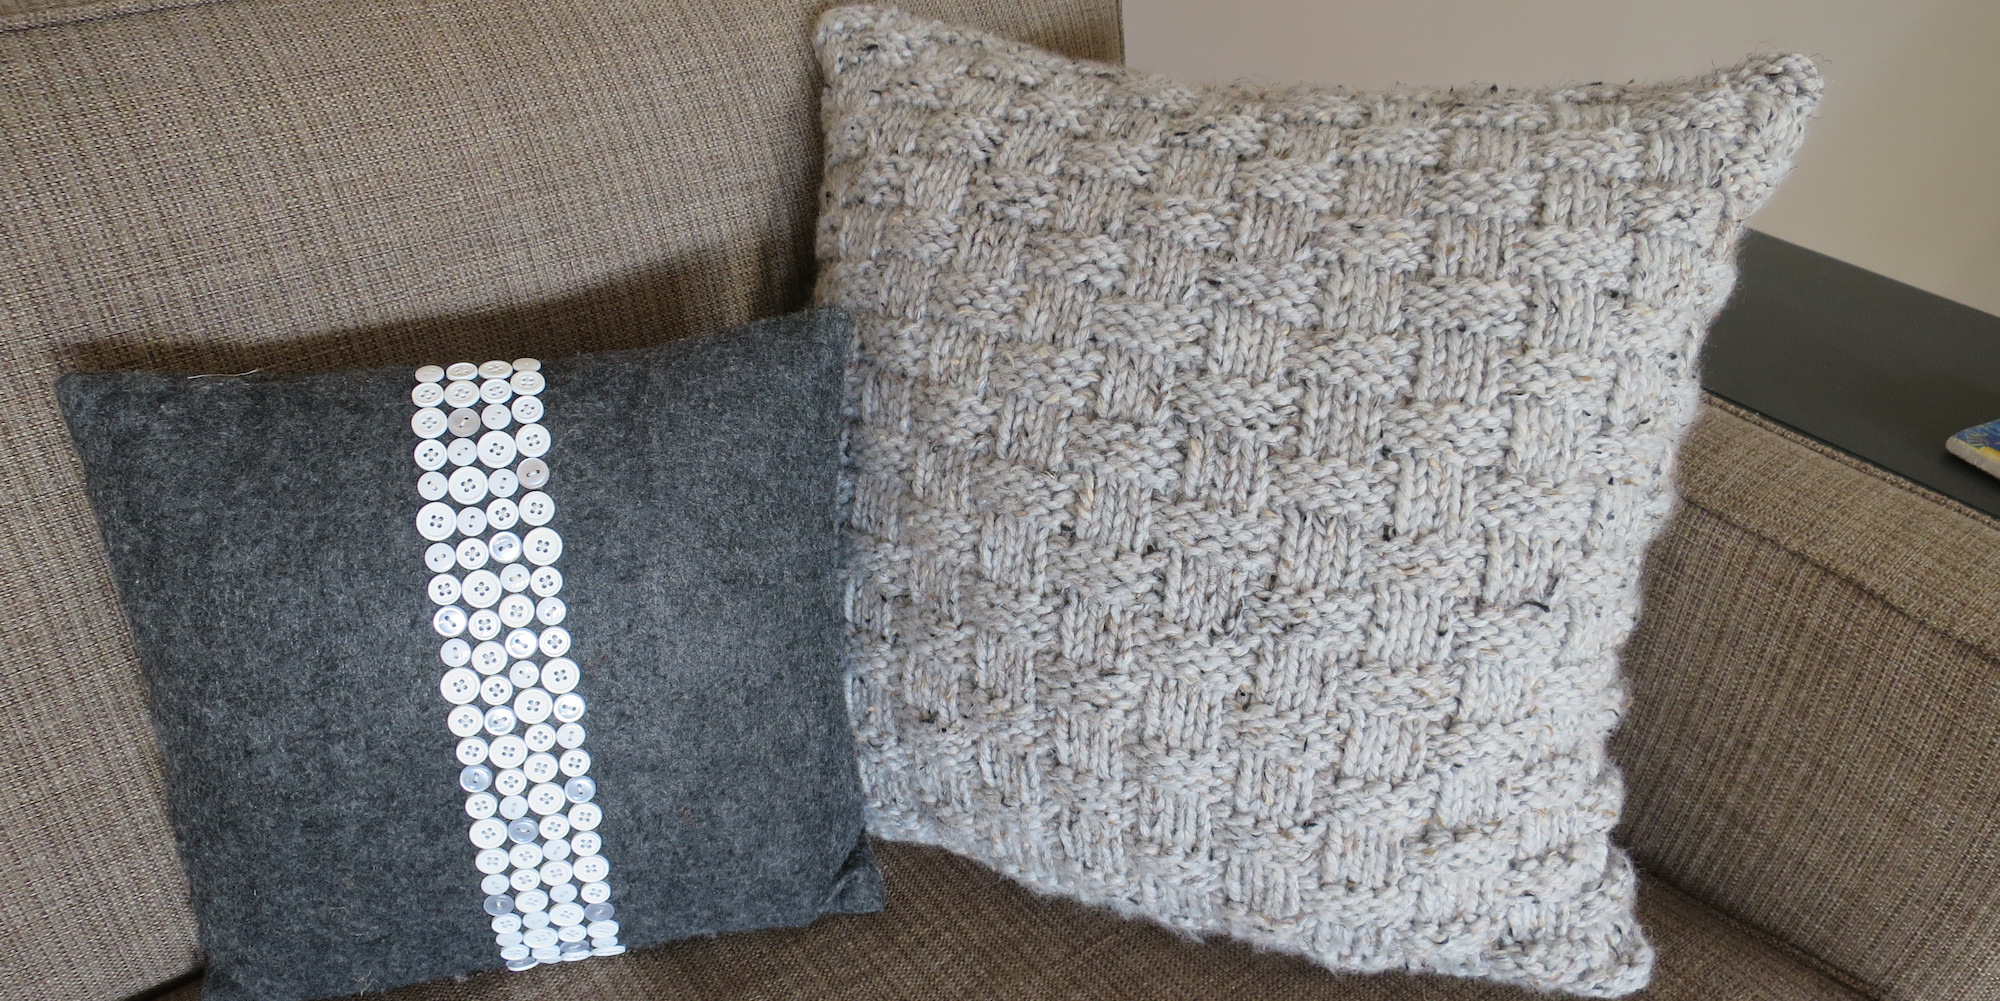

For this Iron Craft challenge, we were to make something for the theme of cozy. In my mind, nothing is cozier than a big bulky knit. I’ve been seeing all these lovely, textural knit throw pillows in stores lately and I love them, but as a knitter, I can’t bring myself to buy one already made. This challenge gave me the perfect opportunity to whip one up.
I love how mine turned out. It was an easy knit and I did it so there were only two edges to seam up. It is big, soft and perfect for cozying up with in front of the fire.
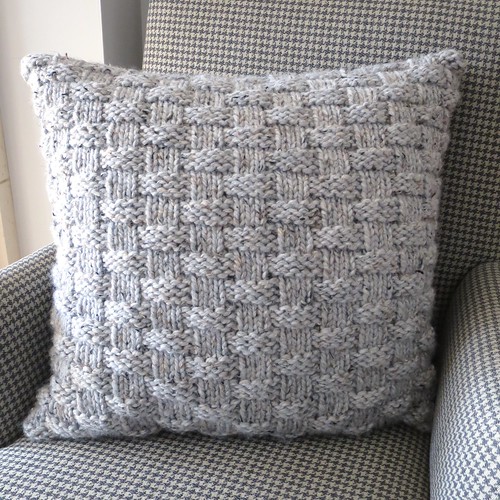
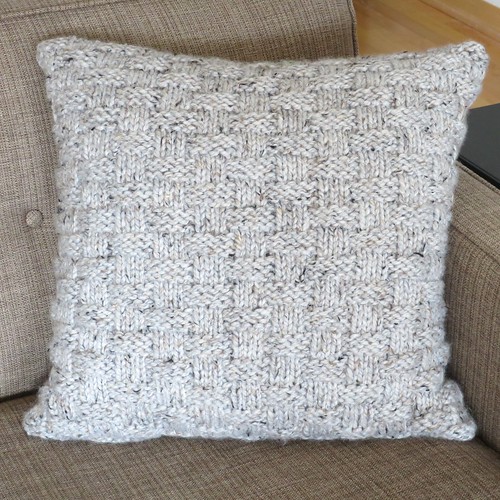
Knit Basket Weave Pillow
*Update 11/27 This pattern was accidentally written to work flat instead of in the round, as it was meant to be. It has now been fixed and should be worked in the round.
Download a pdf of the Knit Basket Weave Pillow Pattern.
These instructions are written for use with a 20″ x 20″ pillow insert, but you can adapt them to fit any size you want. The stitch pattern requires a multiple of 8 plus 3 stitches. I like to make my pillow cover about 1 1/2″ – 2″ shorter in both directions than the insert because the knitting stretches and I like a well-stuffed pillow. So, say I wanted to make a cover for an 18″ x 18″ pillow insert. That would mean I wanted it to be 16″ wide. I would take 16 and multiply it by 2.75, which equals out to 44 stitches. In order to make it work with the pattern, I would only use 43 stitches, 8 x 5 = 40 +3. So, I would cast on 86 stitches, 43 for the front of the pillow and 43 for the back.
Supplies:
- 318 yards of super bulky yarn (I used 3 balls of Lion Brand Wool-Ease Thick & Quick in Grey Marble which is lovely.)
- 36″ size 11 circular needle (or size needed to get gauge and length that holds your stitches easily)
- stitch marker
- needle with an eye big enough for the yarn
- 20″ x 20″ pillow insert
Gauge: 11 stitches per 4 inches (approximately 2.75 per inch)
Abbreviations:
- k – knit
- p – purl
Cast on 102 stitches. Place a stitch marker between the first and last stitch to mark rows. You will be knitting in the round.
Row 1: k51, p4, k3, *p5, k3, rep from * until the last 4 stitches. p4 (The 51 knit stitches are the back of the pillow.)
Row 2: k51, p4, k3, *p5, k3, rep from * until the last 4 stitches. p4
Row 3: k51, p4, k3, *p5, k3, rep from * until the last 4 stitches. p4
Row 4: k
Row 5: k51, k3, *p5, k3, rep from * until end of row.
Row 6: k51, k3, *p5, k3, rep from * until end of row.
Row 7: k51, k3, *p5, k3, rep from * until end of row
Row 8: k
Repeat rows 1 – 8 until pillow measures 18″or desired length. The pillow will look neatest if you end on either row 3 or 7 of the pattern. You may want to slide your insert into the knit cover to make sure you like the fit.
Divide the stitches so that the first 51 knit stitches are on one needle and the remaining patterned stitches are on another (or two sides of your circular needles). Seam shut with kitchener stitch. (Kitchener stitch finished the edge of the pillow seamlessly, but if you prefer you can bind off and seam the end shut.) Weave in any ends.
Slide in the pillow insert. You can see mine fit quite tightly. There was enough of the cover to fit it easily when I pulled it together, but it was not baggy at all.
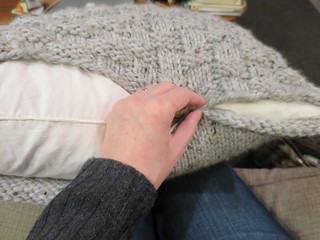
Seam the bottom edge shut.
Copyright 2014 Kathy Lewinski JustCraftyEnough.com
Do not duplicate for distribution, repost, sell or teach without permission.
© 2005 – 2014 Kathy Lewinski & Susan Cornish

Kathy, I think you have your instructions here:
“That would mean I wanted it to be 16″ wide. I would take 16 and divide it by 2.75, which equals out to 44 stitches. In order to make it work with the pattern, I would only use 43 stitches, 8 x 5 = 40 +3. So, I would cast on 86 stitches, 43 for the front of the pillow and 43 for the back.”
You need to MULTIPLY the width by 2.75, not divide it. In fact, that is what you did (16 x 2.75 is 44) but it would be confusing for someone else trying to work out a different size!
I love the pillow, though. So cosy!
Gah! Meant to say ‘you have your instructions wrong here’… 🙂
Oh my gosh, good catch Ros! My head has been a little distracted these days.
Pingback: Picks of the Week for November 21, 2014 at Hands Occupied
Pingback: Knit a Simple Basketweave Pillow to Cozy Up Your Home – Knitting
If I use a Provisional Cast On I can close both ends with the Kitchener stitch.
You totally can do that!
I only started knitting in October and think Knitting in the round may be beyond me, is there any way of getting the pattern knitting it flat? Thanks
To knit it flat, just make each section separately then sew them together (or do 1 long piece that has the back followed by the front, therefore only requiring the sides & top/bottom to be sewn up). So if you were to make the one in the pattern, you’d cast on 51 stitches & work in stocking stitch (knit 1 row, purl 1 row, until you reach your desired length (in the round you only need to knit as there is no wrong side to your work). Then you would make the basketweave side, so either continuing from the back or cast off/bind off, then work the front separately. If making separately, cast on 51 for the front & follow the instructions as per the pattern above, but ignore the k51 for each row.
Hope that helps! 🙂
Thanks Toni! I did email Drea with the answers. I should have put them here too 😉
New knitter here….
I am working on a project where I am teaching myself a new pattern with 1 skein of Lion Brand 5 oz weight per block yarn. I am casting on 40 stitches for each skein/block. My goal will be to stitch (somehow) together all the blocks completed into an throw, say 4 blocks by 4 blocks. I would like to try the basket weave pattern next. I am using #13 needles.
If I read your post correctly, I would cast on 40 + 3 stitches to being the basket weave pattern. Is that correct? I really just want a block front to add to the other 2 blocks/different patterns I have already completed.
Hope this makes sense. Thanks so much. Love the pillow!
Yes, any multiple of 8 plus 3 stitches will work, so 43 will work. Keep in mind if you are knitting this block flat you’ll need to switch the knit and purls every other row from what I have above, like this
Row 1 (RS): p4, k3, *p5, k3, rep from * until the last 4 stitches. p4
Row 2 (WS): k4, p3, *k5, p3, rep from * until the last 4 stitches. k4
And so on…
Good luck!
Also what thickness is the needle in inches if size 11 ( is that size 11 US)?
Thanks
Drea, I believe that it is US size 11, so that would be 8mm needles (metric) or size 0 for Canada or UK (most work in mm in UK). I’ve never heard of anyone stating needle sizes in inches!
Hello, I’m a bit stuck. I am a beginner knitter, and I am looking to make a pillow cover for a 16″ x 16″ pillow. I think your pattern looks gorgeous, but I can’t work out how many stitches I would need to make it fit my pillow? I am open to trying circular knitting, but also don’t mind knitting in the flat (considering that I have never knit in the round before!)
I have found some yarn that I think I may like to make the pillow from, but they ask for 9mm needles (Stylecraft Nordic Super Chunky), if that helps!
Many thanks
Charlotte
Charlotte,
It is all about your gauge. Knit up a swatch with your yarn and the needles you want to use. Measure it and count how many stitches are in an inch. Now you need the pillow to be about 30 inches around (That will make a nice tight cover for a 16″ pillow.) So, multiply 30 by the number of stitches per inch and that will give you the number you need to cast on. Keep in mind that the pattern for the front of the pillow requires you use a number of stitches that is divisible by 8 plus 3 stitches, so you may need to tweak the actual number of stitches you use by a few. Then just knit until the pillow is 15″ long.
Pingback: Three Things 1.28.17: Full Rainbow, TV Watching, Easy Knitting + Links
Pingback: 20 Cute Pillow Patterns You Can Knit Up This Weekend - Ideal Me
Pingback: Free Best Knitting Pillow Patterns | Patterns Center
Pingback: 11 Free knitted Pillow patterns (DIY Home decor) - SmartpenniesLife
Pingback: 10 Free Pillow and Cushion Knitting Patterns to Cozy Up Any Space
Pingback: canvas tote with leather handles
Pingback: benchtop horizontal milling machine
Pingback: black handbags
Pingback: digital caliper reviews
Pingback: building block wood toys
Pingback: more information
Pingback: leather top handle bag
Pingback: davina mccall workout clothes
Pingback: Union Ic Ac`s blog
Pingback: anifeel
Pingback: womens leather satchel
Pingback: straps for crossbody bags
Pingback: pump for hatsan and benjamin air rifles
Pingback: generac 7019 onewash with powerdial gun pressure washer
Pingback: luxury crossbody bags
Pingback: Wallpaper For Table top
Pingback: full asian Porn movies
Pingback: homemade ultrasonic cleaner solution
Pingback: Padrões de travesseiros de tricô gratuitos - 15 melhores -
Pingback: Roundup: 10 Cozy DIY Projects For Winter - Curbly