


(For the 24 weeks leading up to December 1st, we’ll be making a Christmas ornament, giving you enough to fill an advent calendar.)
For this week’s ornament we are taking a plain Christmas lightbulb and turning it into a glittery shiny ornament.
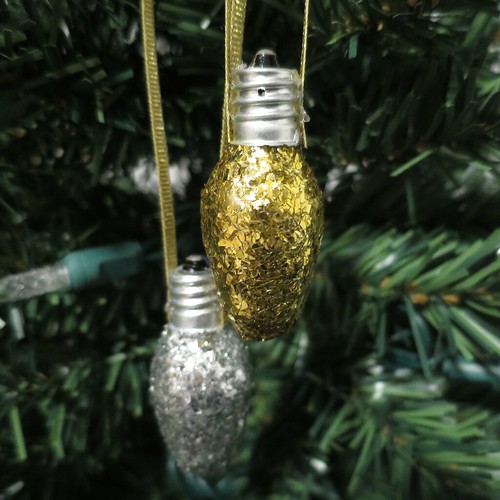
I’ve seen these in all different sizes, from huge to teeny-tiny, for sale in stores and thought, why not make our own. I like the fact that this version has a real lightbulb base instead of some plastic cap.
You can use old blown out Christmas bulbs or buy new ones.
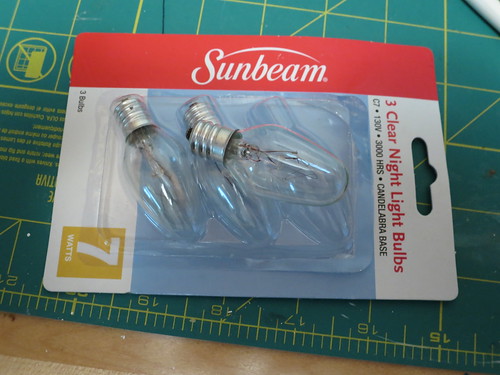
I found these bulbs called nightlight bulbs, which are the same shape, at the dollar store for 3 for $1.
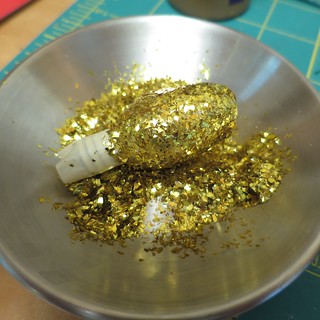
I want to talk a little about the glitter I used on these. Glitter comes in all different sizes. I typically like to use an extra fine glitter because it covers so well and gives a smooth glittery look. For this project, I decided to use a much bigger particle version.
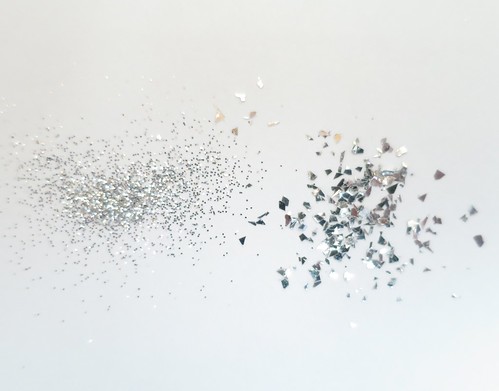
I think it gives the ornaments almost a disco ball or broken glass look compared to the smaller glitter. Plus the big flakes catch the light really nicely.

Of course, you can go with any size you like. Just a note though, I tried using glitter glue and glitter paint. I have not found one that gives a full glittered coverage that a thick coat of glue and loose glitter do. Sure this method is a little messier, but you’d be painting for days to get a coat like this from the other stuff.
Glitter Lightbulb Ornament
Supplies:
- Christmas tree or nightlight bulbs
- masking tape
- thick glue like tacky glue
- paintbrush
- large flake glitter
- small bowl or plate
- glossy polyurethane or varnish
- ribbon
- hot glue gun and glue
1. Cover the base of the lightbulb with masking tape.
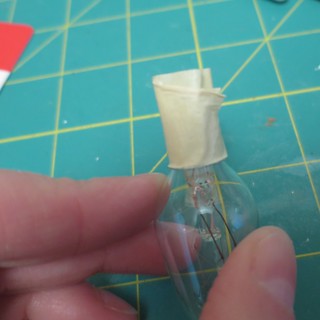
2. Paint the glass part of the bulb with a very thick coat of glue.
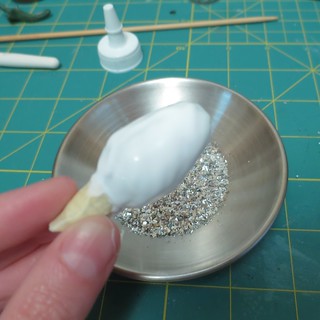
3. Pour glitter into a small bowl or plate. Turn the glue-covered lightbulb in the glitter until completely coated. Use your fingers to really press it in and down. Let dry overnight.
4. Remove the masking tape. Paint over the glitter with a coat of polyurethane or varnish. Let dry.
5. Cut a piece of ribbon to use as a hanger, about 8 inches. Glue the ends to two opposite sides of the base of the lightbulb with hot glue. (I tried using tacky glue, E6000 and super glue to do this. Hot glue was the only thing that held quickly and securely.)

I struggled with the best way to hang these so if anyone has any other ideas, I’d love to hear them.
© 2005 – 2014 Kathy Lewinski & Susan Cornish


I wonder if craft wire would do the trick. Maybe make a “U” loop and then wrap around the screw part of the bulb to cover the exposed ends. First thing that came to mind.
I can’t believe you only have six more weeks.
That might work! I can’t believe only 6 weeks left either, where did the time go?!