

When we go on vacation, I need to grab all the electronic cords and all the battery chargers for all the devices. I wanted to make something to carry those all together and have them arrive safely. Thus the Cords To-Go Pocket was born.
Cords To-Go Pocket
Supplies:
- 2/3 yard of outer fabric
- 2/3 yard lining fabric
- 1/2 yard clear vinyl
- 1 package of double fold bias tape
- 16 inches of 1″ elastic
- velco (optional, for closure)
- ribbon or trim (for closure)
- tissue (to help sewing the vinyl)
- thread
- scissors
- sewing machine
- rotary cutter, cutting mat, quilter’s square – optional, but helpful
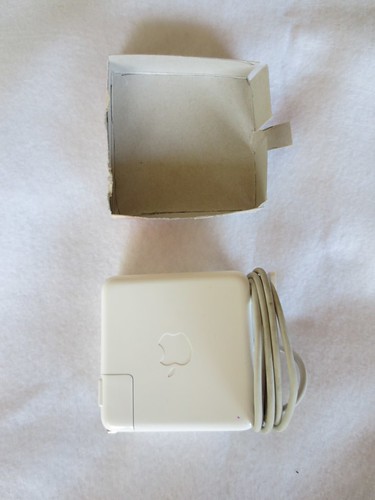
Note: my pocket is based on the Mac battery brick in the center square. If you have different needs, adjust your measurements accordingly.
The first thing I did, was to open up a cardboard cracker box, that I had just finished eating and created a box model. This way, I would know if the pockets were big enough to fold over when they were full.
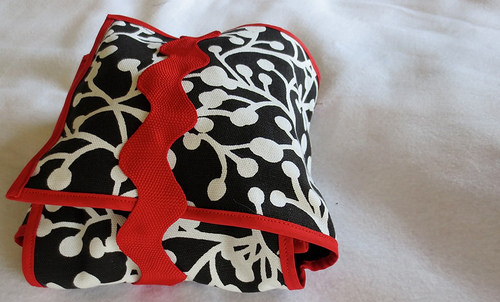
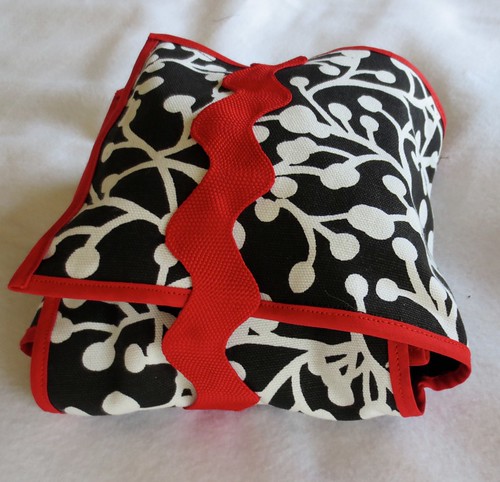
Cut out the “Swiss Army cross” from both fabrics. In the pictures here, the outside of the pocket is the berry branch pattern, and the lining fabric is black. (The carrier is one solid piece of fabric. The middle square is 6 x 6. Each pocket is 8 x 6. Across the whole thing is 22 x 22.)
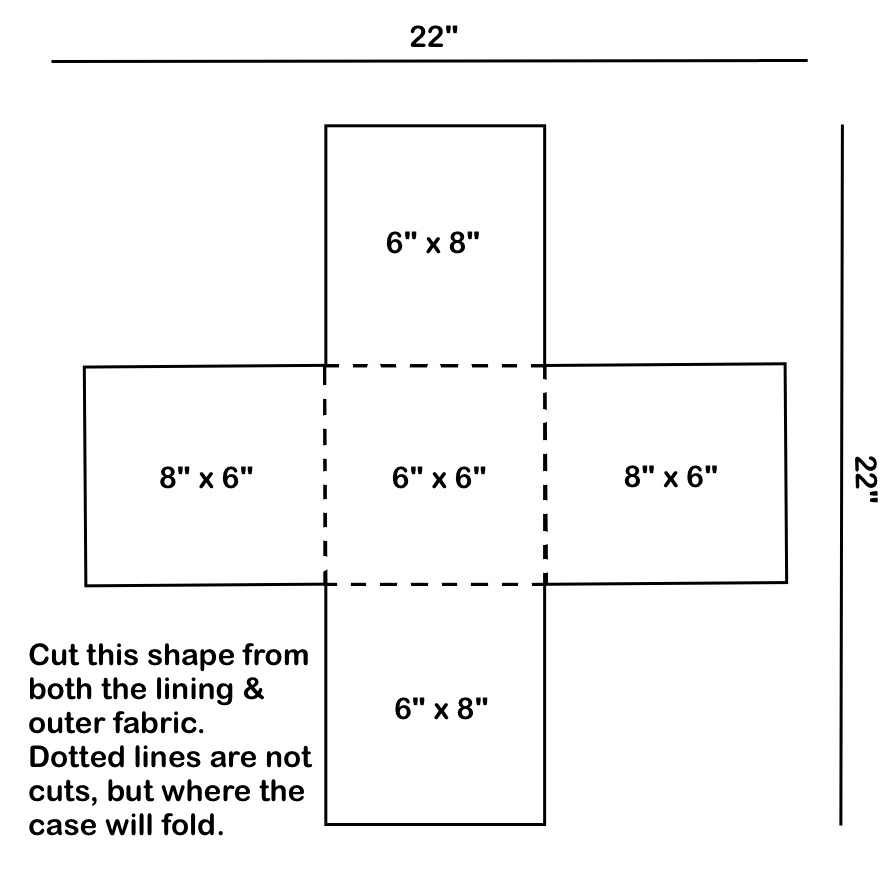
Cut one stabilizer square to fit the middle square.
Cut four vinyl squares to fit inside four legs of the cross to make the pockets, 6×7, and then round the top of each for ease of putting stuff in and out.
Iron fabric (Last chance here, the clear plastic melts easily.) (wink)
Prepare the lining piece:
Iron/sew stabilizer to wrong side of lining. (I started by ironing, but I needed to sew it for stability as well.)
Sew elastic straps to right side of lining (The picture below does not show these straps in place. They are visible in the finished picture lower down.)

Note: Here I sewed the pockets to the lining fabric, just so they would be lined up for later. I sewed VERY close to the edge with big stitches. I treated this step like basting.
Assembling the layers:
Line up the outer fabric, lining fabric, clear vinyl and tissue, and sew the bottom three sides of each pocket.
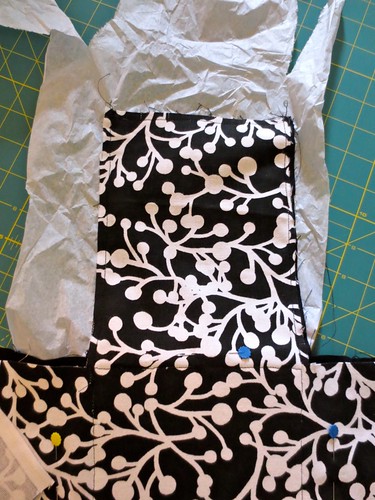
The picture below shows how it looks just after the paper has been ripped away.

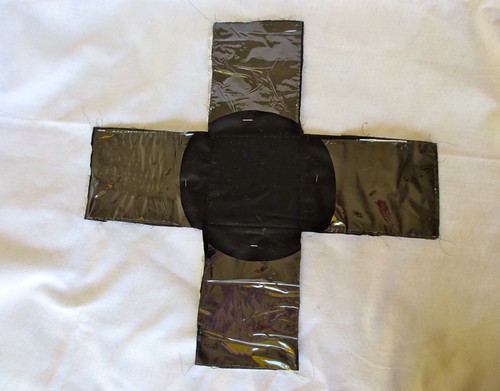
Trim and straighten up all the layers. (A rotary cutter and quilt square and cutting mat made this EASY)
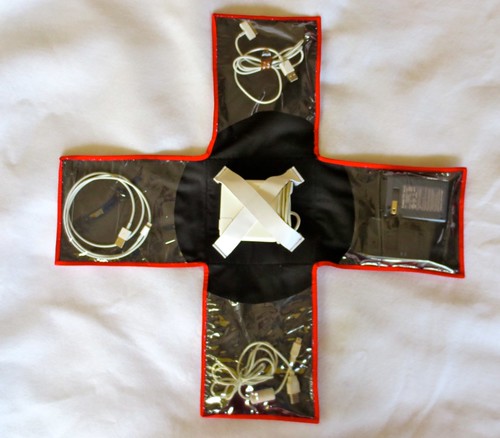
Add double fold bias tape trim all around. (This was a fussy step. But worth it for the “punch” in the end)
If you would like a primer for a mitered corner in bias tape, I found this tutorial to be helpful.
Add the cords, batteries and chargers and fold it up.
Depending on how much you have put in it and how secure you feel like it needs to be, make a decision about the closure. I added a velcro dot to the ends of bold oversize ric-rac. That was just the right touch (for mine)

I am so excited to have this handy case. And will you look at that – it is done in January (for our summer vacation!) What a great start!
© 2005 – 2014 Kathy Lewinski & Susan Cornish


Pingback: Tutorial: Cords To Go Pocket | Sewing | CraftGossip.com
What a great project. I can’t wait to make it. We’re snowed/frozen in the south so I may do some sewing day.
Thanks for sharing.
Pingback: Tutorial: Cords To Go Pocket | Making-Money-With-Crafts
That is awesome Kat!! I may have to make that! Thanks for sharing!
Thanks! I’m glad you like it! The fussiest part was the bias tape all around the edges. But I like the way it looks, so I think it was worth the work in the end. Share a picture if you do make one! – Susi
This looks awesome! I have a question though….. In some of the last pictures the middle of the case is rounded out and the vinyl looks rounded on the inside edge. When do you do that and how did you do that? Also, what weight stabilizer did you use for the middle? I can’t wait to make my husband some of these for all of his computers and musical gear he hauls around.
Thank you!
Janet. ON the top opening of each vinyl square, I just cut a rounded edge. It was cool how it came together to look like a circle when it is all laid out. But that was unintentional. (Is that what you mean by “the case is rounded out”?)
I am sorry I don’t know exactly which stabilizer I used. But it was about as thick as a BIG sheet of cardboard. I have to guess it was the thickest one at the store.
I hope that helps!!! I’m excited your going to make one!