

There was a big Bernal Wide Garage Sale, and we were out at dinner party when we picked up a sad little cast off Skuut that did not sell.
(Sadly, no before pictures.) The bike had blown a tire – big-rig style. The rubber had let go, and there was just a ring of rubber hanging on. I thought we could wipe the bike down, and replace the tire, and bam, away you go! So I asked my husband if he could do that. Well. You have to know that he does nothing by halves. The entire bike was tricked out. It was taken apart, sanded, primed, painted, “metal flake”d. (glitter paint), clear coated, and reassembled. All of that was done by my husband.
I do want to show you my contribution.
I recovered the seat.

The original seat was a bit chewed up. Literally. I am not sure if the previous kid wore sand paper shorts or what.
I laid the seat down on the fabric and cut a square. Then I started shaping the fabric. I used a fabric pen, and traced around the seat upside down.
Then I cut about 2 inches away from that line all the way around.
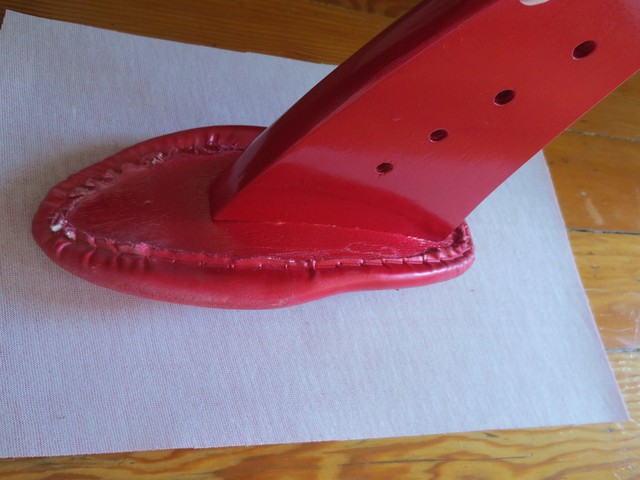
Naugahyde is very thick, and not as mailable as leather. So when it came to the stapling phase, I did not get the flexibility I was looking for.

I left the leather in place. And the 4567 staples that were there, all stayed there.
I started by stapling at the top of the seat, and then pulling the fabric snug, and stapling the bottom of the seat. I worked the sharp front, and tried to keep the fabric tight, and the tucks small. But the Naugahyde is so thick, that there were still visible tucks around the front and the back.
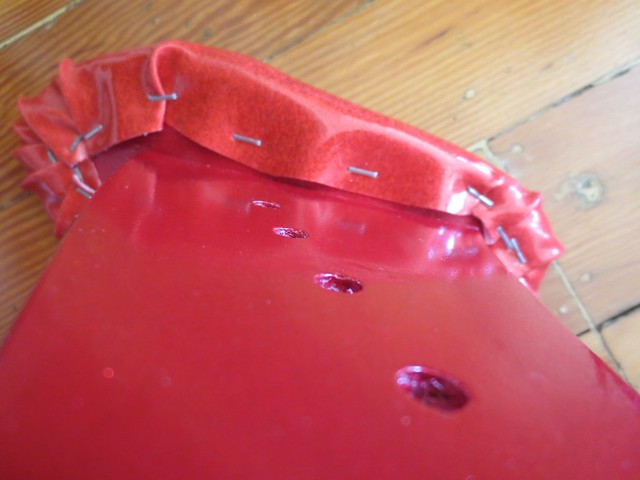
I did not feel the need to staple every millimeter down. But just enough. And it looks worse from the bottom than it does on the bike. But you can see the challenges.
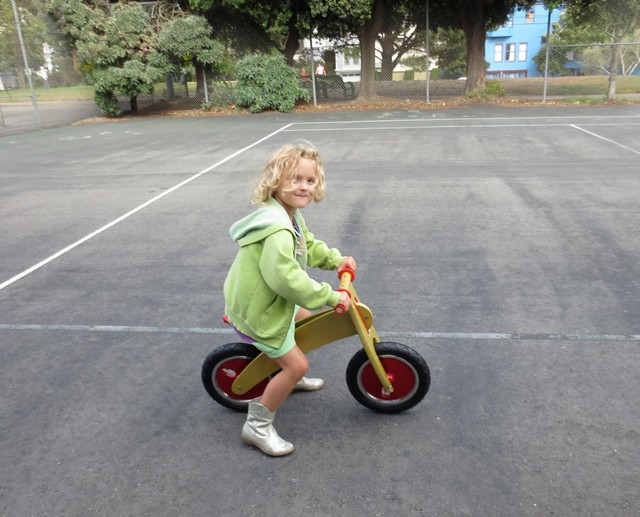
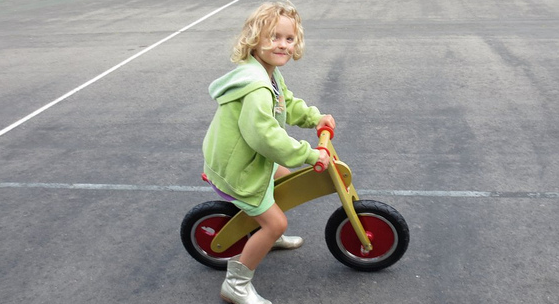
And here she is. (She needs a helmet. This is just a photo shoot.)
This long legged wonder will only last on this bike until she get the feel for it. And then, she will graduate to a taller model.
I have to say, this was FUN! I didn’t think I could do a “good enough” job (especially when I saw all the modifications my husband had done!!) I am now on the hunt for more things to do with a staple gun. No road-side cast-off project will be safe from now on! Be warned. I am looking to move into the big leagues of reupholstering.
What about you? Have you worked with a staple gun before? Or reupholstered? Show us!
© 2005 – 2013 Kathy Lewinski & Susan Cornish
