

(Every week until December 1st we will be making a small Christmas ornament that can be used in our Pocket Advent Calendar. Join us in making all 24 or just pick and choose your favorites.)
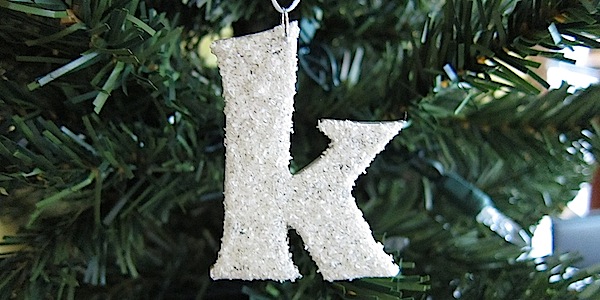
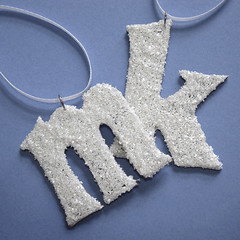
This week we are making a personalized ornament, an initial that, thanks to white glitter, looks like it’s snow covered. A three dimensional gloss medium is covers the glitter keeping it from falling off, adding more shine and making giving it a stiffer, more finished shape.

I got the idea for this project from I (Heart) 2 Stamp. I thought the resin encased glitter would shimmer against the lights of the tree. She used a cool product called Diamond Glaze to top the glitter. After some research I found that Diamond Glaze was only available at something like three scrapbooking stores in Minnesota. So, I decided to see if I could get the same effect with another product.
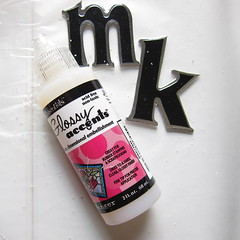
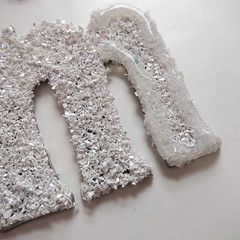
I picked up Mod Podge Dimensional Magic at Joanns and Inkssentials Glossy Accents at Archivers scrapbooking store. I did a letter with each of them.
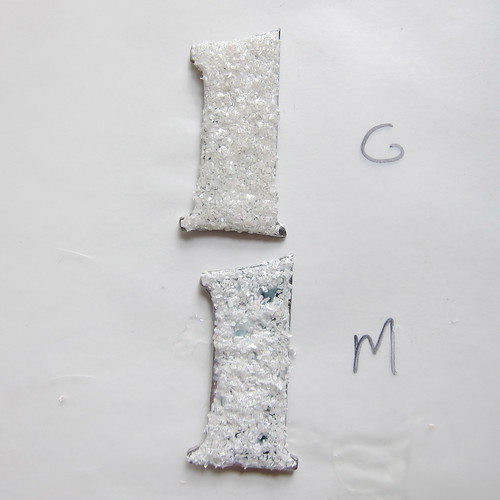
The top one here is Glossy Accents and the bottom one is Mod Podge. Mod Podge Dimensional Magic really didn’t work at all. It is too thin and really needs sides to hold it in. Glossy Accents is much thicker and stays in place. It nicely encased the glitter, but it did not give the smooth finish the inspiration project had. Still, since I was going for a snow covered look, the bumpiness doesn’t really bother me. I experimented with adding a second coat of the Glossy Accents. This did give a smoother top, but it took away a lot of the shimmer of the glitter. The Glossy Accents also seemed to dry slightly yellow (the second coat made it even worse). It’s not a big deal unless you are holding your project against a true white.
Ok, experimenting down, time to make our ornament…
Snow Covered Initials
(click on on any picture to see it larger)
Supplies:
- cardboard or chipboard letters
- white glue
- white glitter
- wax paper
- Glossy Accents
- small needle or nail
- 1/4″ jump ring
Other Helpful But Optional Items:
- small spoon
- toothpick
1. Cover letter completely with a thick coat of white glue.
2. Sprinkle heavily with white glitter. I found a small spoon made it easy to spread the glitter on top. Do this on a piece of paper so you can reclaim the excess glitter for another use. Pat down lightly. I used a toothpick to help move any glitter I didn’t like hanging off the sides. Let dry.
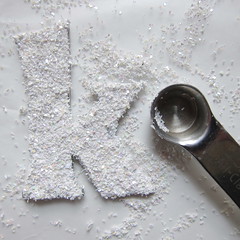
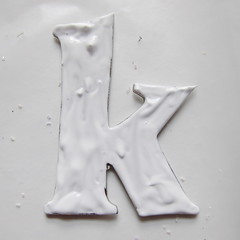
3. Shake any excess glitter off the dry letters. Move to a piece of wax paper. Cover the top of the letter with a coat of Glossy Effects. Start but outlining the letter and then filling in. Let dry overnight.

4. Use a small pin or nail to put a hole through the top of the letter. Put the jump ring through the hole.

© 2005 – 2012 Kathy Lewinski & Susan Cornish


Thank you for this project. It is something that my granddaughters and I can do together. But I am going to connect first, middle, last intials (youngest goes by first/second name). So, using jump rings on opposite corners it will create a stair step ornament. I have most of ornaments my own daughters made as children and have passed them down for their trees. Makes for special memories trees with traditions being passed down. Happy Holidays for 2013!
Glad you liked it. Have a great holiday too!