
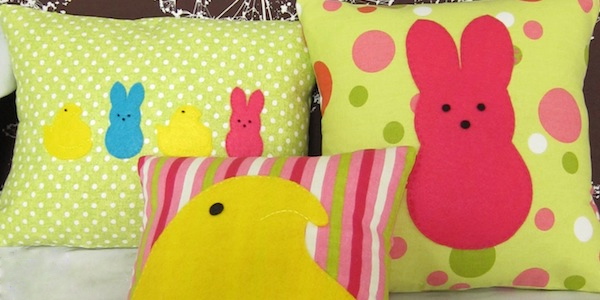

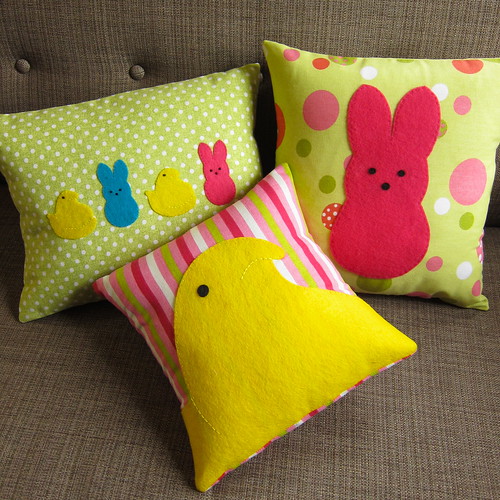
Yesterday, I showed you all these peeps pillow I made for the Iron Craft challenge. Today, I’ll show you how to make your own.
This project takes some basic sewing skills and a steady hand to cut out the patterns, but
other than that it’s a pretty simple project.
Not feeling very crafty? You can win this set of Peep pillows here.
Pop Art Peep Pillows
Supplies:
- Peeps Patterns (download the Peeps Patterns)
- Scissors
- Glue Stick (optional)
- Pink, Blue and Yellow Felt, 1 sheet of each
- Scrap of Black Felt
- White Cotton or Cotton Blend Fabric (optional)
- Three Different Pattered Fabrics, 1/2 yard each
- Ruler
- Fabric Glue
- Paint Brush
- Embroidery Floss to Match Felt, I used DMC 307, 600 and 3844
- Mark B Gone marker, always check if the marker will come off your fabric before using it
- Black Embroidery Floss
- Embroidery Needle
- Three Pillow Inserts, sizes 12″12″, 14″x14″ and 12″x16″
- Sewing Thread to Match Fabrics
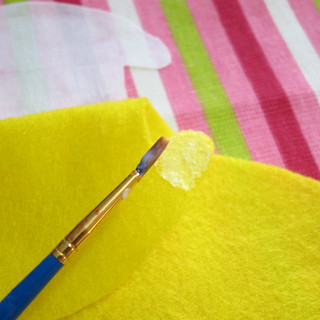
1. Cut paper patterns out and use them to cut peeps shapes from the felt. I glue the patterns to the felt with the glue stick, I find it works nicer than pins on these small patterns. Cut one large chick and two small chicks from the yellow, one large bunny and one small bunny from the pink and one small bunny from the blue.
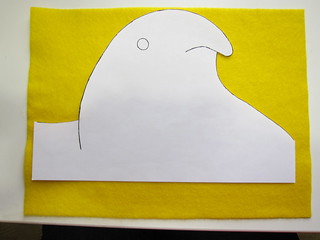
I wanted the large yellow chick to be bigger than a regular piece of paper would allow, so when I was cutting it I laid it out like the photo above. Then cut all the way to the edges width-wise and kept all the extra felt at the bottom. The felt is 12″ which is the size of the pillow I was putting the chick on.
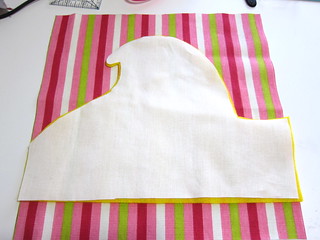
2. The felt, especially the yellow, is a little see-thru on bold patterns. I cut the patterns from the white fabric slightly smaller than the felt ones. Then I glued the white fabric to the back of the felt. It worked really well on the large pink bunny, but you can still see through the large peep a little bit.
3. Cut the front pieces of your pillows. My trick to a really plump pillow is to cut the pillow pieces the exact size of the insert, so for the 12″x 12″ pillow I would cut a 12″ x 12″ piece of fabric. Cut a 12″ x 12″, a 12″ x 16″ and a 14″ x 14″ piece, each from on of your fabrics.
4. Center your peeps on their pillow fronts. The large chick goes on the 12″ x 12″, the large bunny on the 14″ x 14″ and the small peeps on the 12″ x 16″.
5. Using a paint brush and fabric glue, glue the peeps to the pillow fronts. I start by bending down the top and glueing it down then folding up the bottom and glueing it down.
If you are using a lining between the felt and the pillow fabric you either need to glue it to the pillow of the felt design before glueing the felt peep to the pillow. I found it worked easiest to glue the lining to the felt peep first, but both ways work.
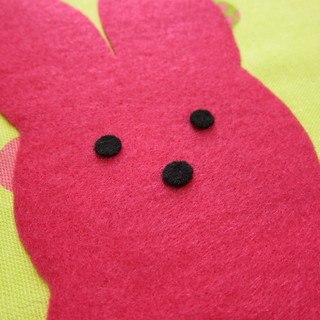
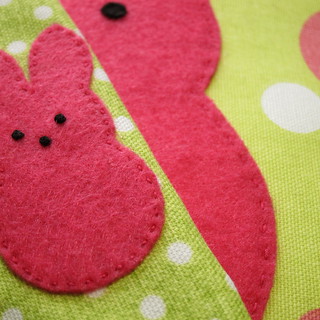
6. Add eyes and noses. For the large bunny and chick, I cut circles of black felt and glued them in place. I used the paper patterns to cut and place the circles.
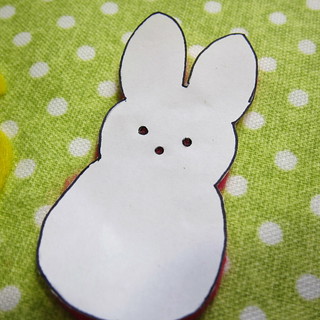
For the smaller peeps, I made double French knots using a full six strands of black embroidery floss. I marked their placement using the paper patterns and a Mark B Gone marker.
7. Embroider detail on the chicks in yellow embroidery floss. I did this in a simple backstitch.
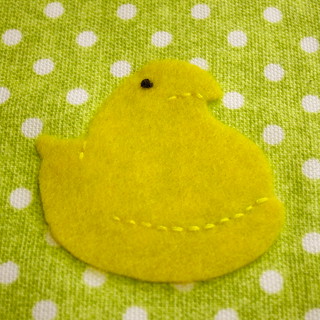
On the large chick, I used six strands of floss. On the small chicks, I used three strands. Once again, I used the Mark B Gone marker and the paper patterns to help layout the embroidery.
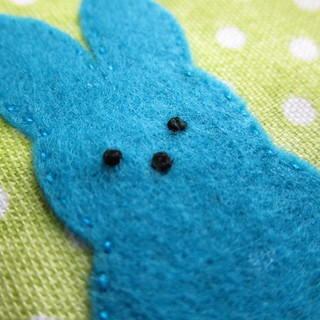
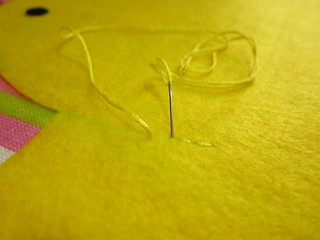
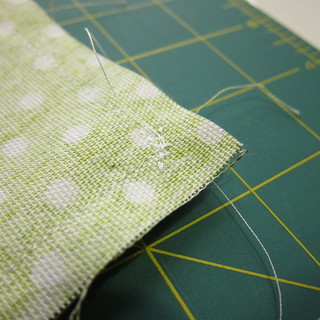
8. Stitch around the edge of each felt peep with two strands its matching embroidery floss in a straight stitch. For the small peeps, I did very tiny stitches, about 1/16th of and inch. For the bigger peeps the stitches were about 1/8th to 1/4th of an inch.
9. Cut the backs of your pillows and sew them together. I decided to do pillows with slits in the back for putting in the pillow insert. Since these pillows are seasonal I want to be able to change them out.
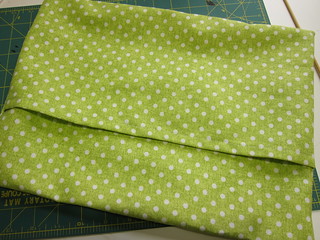
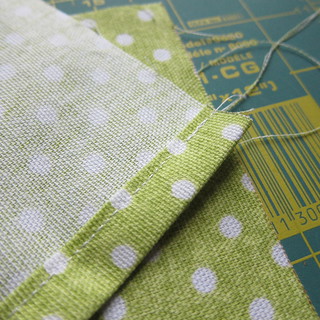
For each of the backs I cut a rectangle that was the width of the pillow front and a half of the pillow height plus 3″. So for the 12″ x 12″ pillow I cut two rectangles that are 12″ x 9″. Then I finished one long edge of each of those rectangles by folding it over 1/2″ and then again 1/2″ and sewing that down.
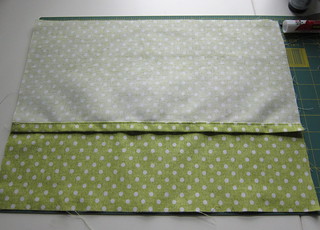
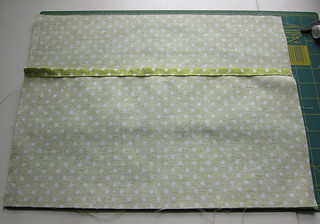
Place your back pieces on top of the front piece, right sides facing, so they overlap in the middle of the pillow.
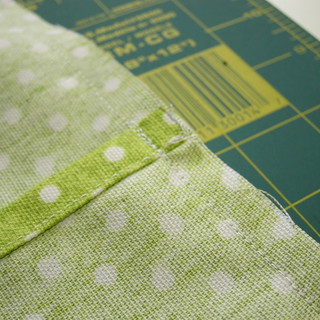
Pin and sew all four sides with a 1/2″ seam allowance. I like to backstitch over the ends of each of the back pieces where they hit the middle of the pillow to keep them extra secure when putting a pillow in. I also like to backstitch at all the corners so I can clip them. I clip all the corners and trim the seam allowance to about 1/4th inch.
10. Turn the pillows right side out. Work the corners out the best you can, a knitting needle or chopstick can help here though be careful not to poke through. The large chick pillow is almost impossible to get square corners because of the felt in the seam so I left them rounded and thing it looks cute. Press if needed, but do not iron the felt. Put pillow insert in through the slit and work into place.
If you make a Peep Pillow we’d love to see it in our Flickr group. Happy Peepster!
© 2005 – 2012 Kathy Lewinski & Susan Cornish


Pingback: Just Crafty Enough – Project – Pop Art Peep Pillows | Pin Up Pillows
Pingback: Tutorial: Pop Art Peeps pillows · Sewing | CraftGossip.com
Pingback: Hopping good DIY roundup | Marie, Oh Marie
These are too cute! I’m doing an Easter link up today over on my blog…http://rustsunshine.blogspot.com. Would love it if you joined us with any of your great Easter ideas!
Pingback: Easter: Pop Art Peep Pillows | Crafts: Unknown Knowledge | Scoop.it
Pingback: 23 Decorative DIY Pillow Ideas for Your Home - Style Motivation
Pingback: 8 Easy Easter Decorations You Can Make
Pingback: To do list #8 : inspiration Pâques | La mallette des minettes
Pingback: OVER 50 MARSHMALLOW PEEPS CRAFTS AND RECIPES - Mad in Crafts
Pingback: 33 Impressive DIY Easter Decorations | Designfup
Pingback: 20 Cute ways to decorate with peeps!
Pingback: 15 Stunning Easter Decorations | On Honeysuckle Hill
Pingback: 19 Fascinating DIY Pillows To Refresh Your Home For Free - Home Decor
Pingback: 19 Fascinating DIY Pillows To Refresh Your Home For Free | iHousDekor
Pingback: 17 DIY Peeps Crafts for Easter | Mom Spark - Mom Blogger
Pingback: Pinterest Feature Friday - PFF #26 - The Scrap Shoppe