

The Architecture of a sleeve: Part one is how to get started when you are stuck.
Here is Part 2: How to proceed with the second sleeve.
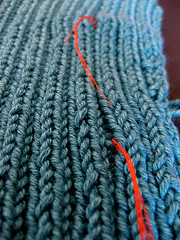
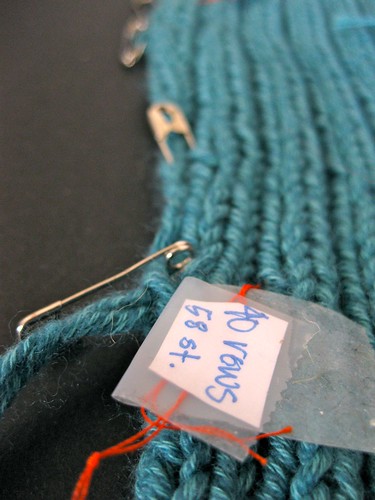
When I was done with my first sleeve, I took a needle and thread, and counted out the stitches. I marked them off with orange thread, and put in little paper tags to help remind me the stitch and row counts.
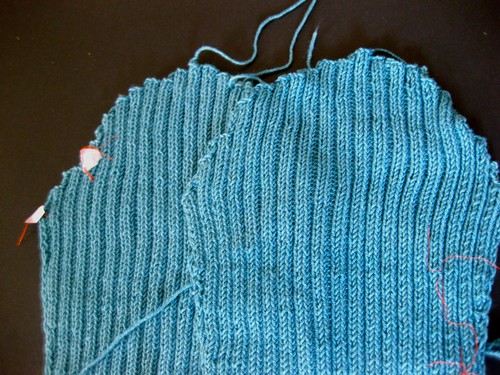
Then, while I was knitting the second sleeve, I put in markers at the same stitch counts.

If you are a note taker – indulge in that skill, and take notes about what you are doing on the first sleeve. How many rows did you knit before you did the increases? And how did you do the shape decreases at the top?
If you are not a note taker, you will still be successful. Just follow the first sleeve, and make a copy of it.
When you finish the first sleeve, use a needle and thread and roughly whip stitch the sleeve together so you can try it on. You can even roughly sew the sleeve into the sweater, and try 3/4 of the garment on. It is really a moment of reckoning. You are trying on your sweater in hopes that you will fall in love with this project. And if you don’t, here is the time to assess and change things up. To rip anything down at this point would be heart breaking. Yes. But it would be less heartbreaking than doing it after the whole thing is stitched up, and the ends are woven in. (!)
Use a contrasting color thread. And take big whip stitches, so that that you can pick them out really easily. Try on the sweater and see if you like what is happening with the fit, and the length of the sleeves.
